Cinnamon Bun Cheesecake

20170417_120821

So much has changed over the past 15 months.  Our family has been through so much, too much.  This year for Easter we didn’t even get together as a family.  I had decided that I was not even going to bake! Why would I? It was just 3 of us at dinner.

I was then asked to make some desserts for another family, a Cherry Cheesecake and some cupcakes.  Then I got the ‘itch’, I must bake!

I was not totally convinced the cherry cheesecake I made had turned out.  You can’t always tell until you cut into them (fingers crossed, I haven’t heard).  I felt I needed to redeem myself, so I decided to make us a cheesecake.  All this was decided on Good Friday – when all the stores are closed and Saturday the stores were a zoo.  It always amazes me how people completely panic when a store closes for a day.  You would think they would never be able to get food again.  Anyways, I was not going to be shopping, I had to use what I had in the house.

I found a recipe for Cinnamon Bun Cheesecake. As intrigued as I was, I was not sure it  would be good.  I am a cinnamon freak, so the thought of it was just about making me drool, but I was not sure how it would pair with the cream cheese.  I was skeptical enough to only make a mini one and halved the recipe.  I also made a back up recipe!

I found this recipe on Life, Love and Sugar.  Check out the site, there are some amazing recipes.

Cinnamon Roll Cheesecake

This is the full recipe – I halved it

Crust
1 1/2 cups nilla wafer crumbs * ( i used grahm crumbs)
4 tbsp sugar
1 tsp ground cinnamon
5 tbsp butter
1. Heat oven to 325 degrees.

2. In a small bowl, combine crust ingredients and mix well.

20170415_120136

3. Press mixture into the bottom and up the sides of a 9-inch springform pan.

20170415_120409

4. Bake crust for 10 minutes then remove and set aside.

5. Cover the outsides of the pan with aluminum foil and set aside.
Cheesecake filling

3 8-ounce packages cream cheese, softened
1 cup sugar
3 tbsp all purpose flour
4 eggs
1 cup sour cream
2 tsp vanilla extract
2 tsp ground cinnamon

1. Reduce oven to 300 degrees.

2. In a large bowl, mix the cream cheese, sugar and flour until combined (Use low speed to keep less air from getting into the batter, which can cause cracks). Scrape down the sides of the bowl.

20170415_120843

3. Add eggs one at a time, beating slowly and scraping the sides of the bowl after each addition.

20170415_121312

4. Add the sour cream, vanilla extract and cinnamon. Beat on low speed until well combined. Set aside.

20170415_121619

20170415_121724
Cinnamon filling

2 cups brown sugar, lightly packed
5 tbsp ground cinnamon
3/4 cup flour
12 tbsp butter, melted
1. In another medium bowl, whisk together brown sugar, cinnamon and flour.

20170415_122556

2. Stir in melted butter.

20170415_122613

20170415_122728

Assembly
1. Break apart cinnamon mixture and sprinkle pieces over the bottom of the crust, about 1/4 of the cinnamon mixture.
20170415_122834
2. Spread about 1/3 of the cheesecake filling over the cinnamon mixture.

20170415_123010

3. Repeat steps 7 and 8 two more times, for a total of three layers of cinnamon and three layers of cheesecake filling.

4. Sprinkle remaining cinnamon mixture over top of cheesecake.

20170415_123419

5. Place springform pan (covered with aluminum foil) inside another pan. Fill outside pan with enough warm water to go about halfway up the sides of the springform pan. The water should not go above the top edge of the aluminum foil on the springform pan.
8. Bake for 1 hour and 20 minutes.
Icing
2 tbsp cream cheese, room temperature
6 tbsp butter, room temperature
1/2 tsp vanilla extract
1 1/2 cups powdered sugar
4-5 tbsp milk
Ran out of time and forgot to take pictures of this process.  Also, threw it together at the end, not the greatest decorative job!
20170416_145709
Looks delicious – minus the horrible icing job
20170416_145714
Layers and layers of cinnamon deliciousness and it smells amazing!
With all the changes this year, I decided to start a new tradition…

20170417_192030

I have had this magnet on my fridge for many years.  This year has shown us too many times that life in fact is way too short.  So….. we had dessert first!  I figured, I made them, I can serve them when I want, haha!  Also, now, no one can say ‘oh I want to, just no room, I ate too much supper!’.  Plus, still the option to have more after dinner.  Really, win-win!!
We enjoyed this mid afternoon – well before dinner
20170416_193221
Absolutely amazing!
As I said before, I was not sure how the two flavours would meld together.  All I can say is perfection!  The cinnamon layers had a subtle crunch to them which added a nice texture to the smooth cheesecake.  The strong cinnamon flavour really came though.  It really tasted like a cinnamon bun!
20170417_120526
I will definitely be making this again, and the full recipe.  This may just be my new favourite cheesecake.
What a wonderful way to start a new tradition!
Thank you Lindsay from Life, Love and Sugar – Life’s better with Cake (oh so true!)


Carrot Cake Cheesecake

20160327_121003

I am very behind on my posts, but I am back at it!  Let’s back up to Easter…yes that long ago.

This years Easter cheesecake I went with something I had seen before, but was very hesitant to try.  Carrot Cake Cheesecake combines both the cheesecake and real cake. It looked amazing but I was very nervous about how the 2 would bake together.

Carrot Cake Cheesecake

from Mel’s Kitchen Cafe

Cheesecake:

2 (8-ounces each) packages cream cheese, room temperature
1/2 cup granulated sugar
2 large eggs
1 teaspoon flour
1 teaspoon vanilla extract
1/2 cup sour cream

For the cheesecake

  1. In a medium bowl using an electric mixer on high speed, beat the cream cheese, sugar, eggs and flour until smooth.20160326_142440

    2. Add the vanilla and sour cream and mix just until blended. Set aside.

    20160326_142946

Carrot Cake:

3/4 cup vegetable or canola oil
1/4 cup packed light brown sugar
3/4 cup granulated sugar
2 large eggs
1 teaspoon vanilla extract
1 1/4 cups all-purpose flour
1/2 teaspoon baking soda
3/4 teaspoon cinnamon
1/4 teaspoon nutmeg
Pinch cloves
1/4 teaspoon salt
1/2 pound finely grated carrots (1 cup or so)

  1. In a large bowl using an electric mixer, beat together the oil, brown sugar and granulated sugar until smooth.

    20160326_143452

  2. Add the eggs and vanilla and beat until the mixture is light creamy and light.

    20160326_143734

    3. Stir in the flour, baking soda, cinnamon, nutmeg, cloves and salt until just combined.

    20160326_144802

  3. Mix in the carrots.

    20160326_144900

5. Preheat the oven to 350 degrees F.
6. Lightly grease a 9- or 10-inch spring-form pan with cooking spray.
7. Spread half of the carrot cake batter into the bottom of the prepared pan.

**I did add a Graham Cracker crust, I can’t imagine a cheesecake without that crust!

20160326_144959
8. Dollop half of the cheesecake batter on top of the carrot cake layer in large spoonfuls. Don’t spread or swirl together. Just dollop.
20160326_145208
9. Dollop the rest of the carrot cake batter on and around the spoonfuls of cheesecake batter. Again, don’t spread it out. If the lumpiness is stressing you out.
20160326_145337
10. Spread the last half of the cheesecake batter on top of all the layers and spread with an offset spatula into an even layer. Tap the pan on the counter a couple of times to get rid of any air bubbles.
20160326_145605
**I baked mine in a water bath, as I usually do.  Bake yours as you wish
20160326_145820
11. Bake the cheesecake for 60-70 minutes (check earlier if using a 10-inch springform pan; it won’t bake as long as a 9-inch pan), tenting the top of the cheesecake with foil the last 20 -30 minutes of baking if it is browning too quickly. The cheesecake will puff a great deal in the oven thanks to the leavening in the carrot cake and it might even crack. That’s ok. It will settle after it cools and will be covered with frosting so the cracks won’t matter. Take care not to overbake the cheesecake or the carrot cake bottom and sides will be dry. It’s a fine balance between taking it out before it’s overbaked but not so early that the cake batter is still raw. Keep in mind that each oven can vary in temperature so watch closely as it gets to the 60 minute mark. The top center part of the cheesecake (just about a 2- or 3-inch diameter circle) should still be slightly soft and jiggly when you take it out.
Let the cheesecake cool completely on a wire rack in the pan.
20160326_173614
Cream Cheese Frosting:
**I did not use this Cream Cheese Frosting, I used my own

3 ounces cream cheese, room temperature
2 tablespoons butter, softened
1 1/2 cups powdered sugar
1 teaspoon vanilla
1 tablespoon sour cream

12. While it cools, make the frosting by whipping together the cream cheese and butter until creamy and smooth. Mix in the powdered sugar a little at a time until the frosting is well-combined with no lumps. Add the vanilla and sour cream and mix well.

13. When the cheesecake has cooled, spread the frosting evenly over the top of the cheesecake. Cover with tin foil or plastic wrap and refrigerate until well chilled before serving. The cheesecake can be made up to two days in advance.

20160327_185451

Look at that!

20160327_121003

This cheesecake tastes every bit as good as it looked

20160327_190052

Huge success!  Everyone loved it!  I thought the cake part was a little under-cooked or too moist, it seemed a little wet.  Everyone disagreed.

It really tasted like a carrot cake.  All the spices came through.  The tang of the cream cheese blended perfectly. I am glad I added the Graham Crust layer, the crunch really gave a nice contracting texture.

I will definitely be making this again!


Thank you for sharing Mel, from Mel’s Kitchen Cafe


Save

Eva’s Original Chimney’s

20160803_141847

Just take a moment and look at that….

Eva’s Chimneys, ever hear of them? Check out their website Eva’s Chimneys here

I had heard of them because I like to keep somewhat up to date on food trucks, I am enthralled by them! Canada is starting to jump on board with food trucks, but we have a long way to go.  There are no food trucks near where I live (besides the odd chip truck, which are also delightful!), so I have not had a chance to try much, but I ogle over them online as I inspire to get to them one day!

20160803_141718

I tend to plan trips around food, sad I know!  I was heading in to Toronto for an appointment, which I, conveniently, booked just before lunch.  To be honest, I really didn’t care about lunch, I was more concerned about dessert!  Just a few days before I found out that Eva’s Chimney’s were located just outside of Union Station for the entire summer, along with numerous other food venues as part of the Union Summer.

After my appointment and lunch we headed back to Union Station. We had a look around at all of the other food vendors and really regretted going to a restaurant for lunch.  There was a huge variety of delicious looking food.  I guess we will have to go back!

I got a little too excited and completely forgot to get pictures of the venue and all the deliciousness.

I went with the Dream Cone – Seen Above

– cone coated in cinnamon sugar
– coated with Nutella
– soft serve ice cream
– chocolate
– toffee bits
– more ice cream
– caramel drizzle
– chocolate drizzle
– 2 brownies- in the bottle so it does not leak, a Lindt truffle!

20160803_142343

The way the make them, you can just pull the ‘cone’ apart.  It comes apart in perfect ribbons.


20160803_142404

20160803_142408

20160803_142550

and the Lindt to hold in all in…

20160803_143014

I ate it all, minus 2 bites that I shared. Every bit of it was amazing!

The cone was light, and sturdy, but not too sweet at all.  In fact the whole thing wasn’t really that sweet.  Maybe the cone cut the sweetness? I was afraid it would get soggy as the ice cream melted (it was 35ºC), but it didn’t.

The crunch of the cinnamon sugar was a nice contrast to the soft dough and filling.

Every bite was amazing!

Mom and Dad shared one, they are not big dessert people.  They got the Eva’s Apple Pie

– cone
– soft serve ice cream
– home made apple pie filling
– more ice cream
– caramel drizzle
– Lindt Truffle

20160803_141732

20160803_142141

Dad, who ate too much lunch only had a few bites but love it!

Mom, who really doesn’t eat dessert ate the rest!  She loved it! She also agreed that it was not sweet at all and quite light.  You don’t get that heavy, full feeling after eating one, and it is big!

We have been raving about Eva’s Chimney’s ever since and agree that we need to go back before Labour Day when the Food Vendors shut down.  Only this time, we will go for lunch and dessert!

To be perfectly honest, I would go to Toronto just for the cone!

Greek Appetizer

20150912_142145

Yesterday was our Annual Poker Run Party! Everyone brings an appetizer and we pick at them throughout the day.   I have my usual ‘go tos’, but I wanted to switch it up a bit.  I needed something that could be made a head, didn’t need to be heated and could please a crowd.  While searching Pinterest, I stumbled across this ‘A Crowd Favorite: Feta Dip’ from Clover Lane .  It looked Delicious!  I had to adapt it a tad as I could not find one of the ingredients and I really didn’t measure.

Greek Appetizer

Olive Oil
Tomatoes – seeded and diced
Green onion – thinly sliced
Feta – crumbled
Garlic, fresh
Oregano
Pepper

1. Select a tray for the amount you want to make.  Drizzle with olive oil.

20150912_132714

2. Add pepper, oregano and garlic

20150912_132846

3. Top with tomatoes, green onions, and feta

20150912_133307

 At this point there was a bit of a kerfuffle, unrelated to the dish, so I forgot to get pictures until it has half eaten! Trust me, it was a lot nice looking when it arrived.

4. Toss together and serve with a baguette or pita

20150912_142145

This was delicious!  Many people referred to it as bruschetta , It really was a crowd favourite. Everyone commented on how good it was and it was devoured!  This may be my new ‘go to’ app.   Thanks Sarah, from Clover Lane, for sharing this recipe.


Popcorn Cake

IMG_7602

It may not be pretty but it is delicious!  It was my birthday this past weekend and I made my request for Popcorn Cake.  Everyone asks me, “what kind of cake are you making for yourself?” NONE!  I would not have a cake if I had to make it for myself!  I love to bake and I would make anyone a cake, but I refuse to make my own birthday cake!  I often hear that people do not want to bake for me because I am bake.  So silly!  I don’t expect a big and wildly fancy cake, anything that anyone makes for me is wonderful!

I posted last years Birthday Popcorn Cake, but this year I was there for the making!  It was ridiculously humid on my birthday so Mom held off making the cake for as long as she could before family arrived.  If you are not from a humid climate let me tell you, popcorn and humidity do not mix well.  The moisture makes the popcorn very chewy, almost like gum.

Mom was not overly impressed that I wanted to take pictures but oh well, it’s my Birthday! haha

Mom’s Version of Popcorn Cake

*nothing is measured – hence why Mom does not bake!

Marshmallows
Butter
Popcorn
Mini Eggs

Directions

1. Put this much butter in a large pot and melt on low

IMG_7567

2. Pour this much marshmallows on top of the melted butter.  Melt on low, stirring occasionally

IMG_7569

3.  When marshmallows are almost melted, start popping popcorn. Mom popped 3 bags

Pour the popcorn in a medium bowl and pick though, making sure no kernels make it though to the big bowl

IMG_7573

IMG_7574

4. Pour marshmallows over top

IMG_7576

5. Add Mini Eggs and stir

IMG_7578

6. Ditch the spoon and get your hands in there!  haha, Mom was struggling with the spoon, she buttered up her hands and started ‘mixing by hand’.  Though this is not suggested as the marshmallows are HOT!

IMG_7581


IMG_7582

7. Press into a well greased bundt pan

IMG_7585

IMG_7589

8. Wrap in and let set

IMG_7596

9. Enjoy the ‘extra’ that didn’t fit in the pan

IMG_7592

IMG_7593

This is the best part! Just like when you are making Rice Krispy Squares, the warm marshmallows make it so gooey and delicious!  When it is warm it just seems so much sweeter! I like to sit down with the bowl and a fork…

20150510_165148

10. When the cake has set, turn it onto a cake tray.  It will probably stick, you will need to ease it out with something that will not scratch your bundt pan

IMG_7599

Slice with a serrated knife and enjoy!

20150510_161928

This was delicious! Mom did an awesome job, once again!  Thank you so much!

Cinnamon Raisin Beer Bread

IMG_7141

My first attempt at Beer Bread went so well, I decided to be adventurous!  I initially wanted to make cheddar, but I didn’t have cheese in the house.  After a short search through the baking cupboard I decided on Cinnamon Raisin!

When I say I was being adventurous, I mean it.  I never (very rarely) stray from a recipe.  I love how baking is such a precise science, follow a good recipe to a ‘tee’ and it will turn out.  I was a litte nervous about how it would turn out, but hoped for the best


Cinnamon Raisin Beer Bread

3 cups self rising flour
3 tbsp sugar
1 can beer
3 tbsp brown sugar + extra for sprinkling
1   tbsp cinnamon- divided
1 cup raisin
1/4 cup melted butter

Directions

1. Combine flour, sugar, brown sugar and 1/2 tbsp cinnamon

IMG_7104

2.  Add raisins

IMG_7106

3. Pour in beer

IMG_7110

4. Stir to combine.  Put half of the batter in a loaf pan

IMG_7114

5. Sprinkle with brown sugar and cinnamon

IMG_7117

6. Top with remaining dough and sprinkle more brown sugar and cinnamon

IMG_7118

7.  Top with melted butter – bake at 375º F for approximately 1 hour

IMG_7120

Fresh from the oven

IMG_7124

Success! My goodness this was delicious!

IMG_7133

I think I am onto something with this beer bread.  Next I plan to do one with cheese!  Give it a try, so easy and so tasty!

Top 10 of 2014!

It’s cliché, but it is hard to believe another year is over.  I’m happy to say I met my goal and did a lot more baking this year than last year.  This year I tried many new things.  There were some amazing results and some horrendous flops!  I like to post about them all, because not everything turns out and that’s ok, frustrating, but ok.

Here are what I think to be my best of 2014 as well as a few honorable mentions.

Honorable Mentions

I have 2 honorable mentions this year.  The first being, I was a judge at a Butter Tart Taste off!  It was an amazing day and I was so honored to be part of it.

20140503_135753

Second honorable mention is for my favourite cake this year.  I really liked how the Camera Cake turned out

20140528_221331

Here is a list of what I picked as my favourites of 2014

10.   S’mores Cups

20140612_090954

These little delights are so easy and very so tasty.  I first had S’mores Cups at the Relay for Life.  One of our team members brought them and I was hooked.  I searched the recipe and made them as soon as possible.  I am not a fan of real S’mores, but these are great!

9. Snickers Popcorn

20140717_192120

This is something I wasn’t entirely sure I would like.  Amy and I were having a baking day, cheesecake was our main delight of the day.  We needed something that didn’t need to be cooked for a family dessert.  Amy picked Snickers Popcorn. Unreal!  It was delicious, and so addicting!  I could not stop. 3 days later when the humidity had got to it I was still wolfing it into me. Excellent and will make again!  It always helps to have someone else to bring you out of your baking comfort zone.  I would have never tried this, but love it!  Thanks Amy!

8. Toffee Cheesecake

20140724_134737

This Toffee Cheesecake was made with the toffee candy I make, kinda like a Skor bar.  This was really good.  I’d definitely make this one again.

7.  Strawberry Pie

20140629_124309

I am starting to get the hang of this pie thing, my crust is improving.  This was my first Strawberry Pie.  It was good.  It got rave reviews from the pie fans of the family, and I admit, I liked it too.

6. OCC #6

20140818_193454

I have been slacking on my Oatmeal Cookie Challenge.  I have been searching for a very long time for ‘my favourite’ cookie. This Oatmeal Cookie is definitely in the running.  It has a great texture, holds its height and had great flavour. The best part? This recipe makes one cookie! Give it a try.

5. Cherry Pie

20140714_154812

This pie was amazing! Hard to believe 2 pies made the list this year.  I’d say this was the perfect Cherry Pie. Hope I can duplicated it next year.

4. Pumpkin Cake

20141013_140940

I am not normally a fan of pumpkin stuff but this Pumpkin Cake was good!  What made it was the cinnamon cream cheese icing. Amazing combination.  It was a huge hit at Thanksgiving.

3. Toffee Chocolate Bars

IMG_6428

These were amazing! I found these Toffee Chocolate Bars on Pinterest.  The picture caught my eye and I knew I had to make it.  They were a huge success.  I loved them.  The gooey middle layer was fantastic and I loved the sugary base.  Definitely worth a try.

2. Pecan Pie Cheesecake

IMG_6797

This Pecan Pie Cheesecake was by far the best Cheesecake I have ever made! The sweet pecan filling went perfect with the creamy cheesecake top.  This got rave reviews and topped everyone’s list as their favourite cheesecake.  You must try it!

1. Christmas Pudding with White Sauce

IMG_6771

Even though I just made this a few days ago, it was by far the best thing I made this year.  Not only was the Christmas Pudding absolutely delicious, but it brought back a family tradition that I can to carry on for many years to come.

I hope everyone had a great year and here’s to a wonderful 2015 filled with many delicious sweet treats!


Nana’s Christmas Pudding

IMG_6771

As far back as I can remember, when we had Christmas dinner at my Nana and Pop’s (Dad’s side) one of many desserts would be a Christmas Pudding with White Sauce.  Nana liked her sweets as much or more than I did, if that is even possible!   Dad said growing up they always had dessert and he always found out what dessert was going to be before he ate dinner, as it would determine how much dinner he ate. haha!

A normal dinner at Nana and Pop’s there would be at least one, maybe 2 different desserts, but come holiday time I would not be exaggerating to say there would be at least 5 different desserts.  When I say desserts I mean a full on fancy cake or something to that extent not like just cookies and squares, though they were there as well.  So, I do get my sweet tooth honestly.

Nana died 14 years ago and we have not had a Christmas Pudding since.  For the past 3 years or so I have bought all the ingredients to make the Pudding and then threw them out in about April.  I would get busy for one reason or another and I just didn’t get made.

This year I was determined! I was going to make the Pudding!

I didn’t tell anyone I was making it, especially Dad.  I wanted it to be a surprise for Christmas.

I got this recipe from my Aunt who got all Nana’s recipes.  I don’t know where Nana got it from, it was just typed on a page.

This will be one of the few recipes I just show through pictures.  This recipe is special to me and I want to keep it a family secret.

Nana’s Christmas Pudding

The Pudding is not at all difficult to make, just time consuming.  It is cooked with steam.  If you do not have a steamer, you need a large pot that your bowl will fit into.   I did not have a rack to keep the bowl out of the water, so I made a tinfoil raiser.


20141221_125237

I got these bowls from Nana ass well.  This is what she made her puddings in.

20141221_125231

Prepare the bowl with shortening and flour

20141221_125220

The only instructions were ‘combine all ingredients’ so that is what I did

20141221_131708

20141221_132131


20141221_132249

Cover with parchment and tie with string

20141221_132612

I accidentally deleted the pictures of the putting in the steaming pot.

7 hours later…

20141221_182724


I made it a week before Christmas, because that is when I had the time.  I wasn’t sure how it would last so I froze it for the week.  I have since learned these things last for EVER, so in the fridge would have been fine.
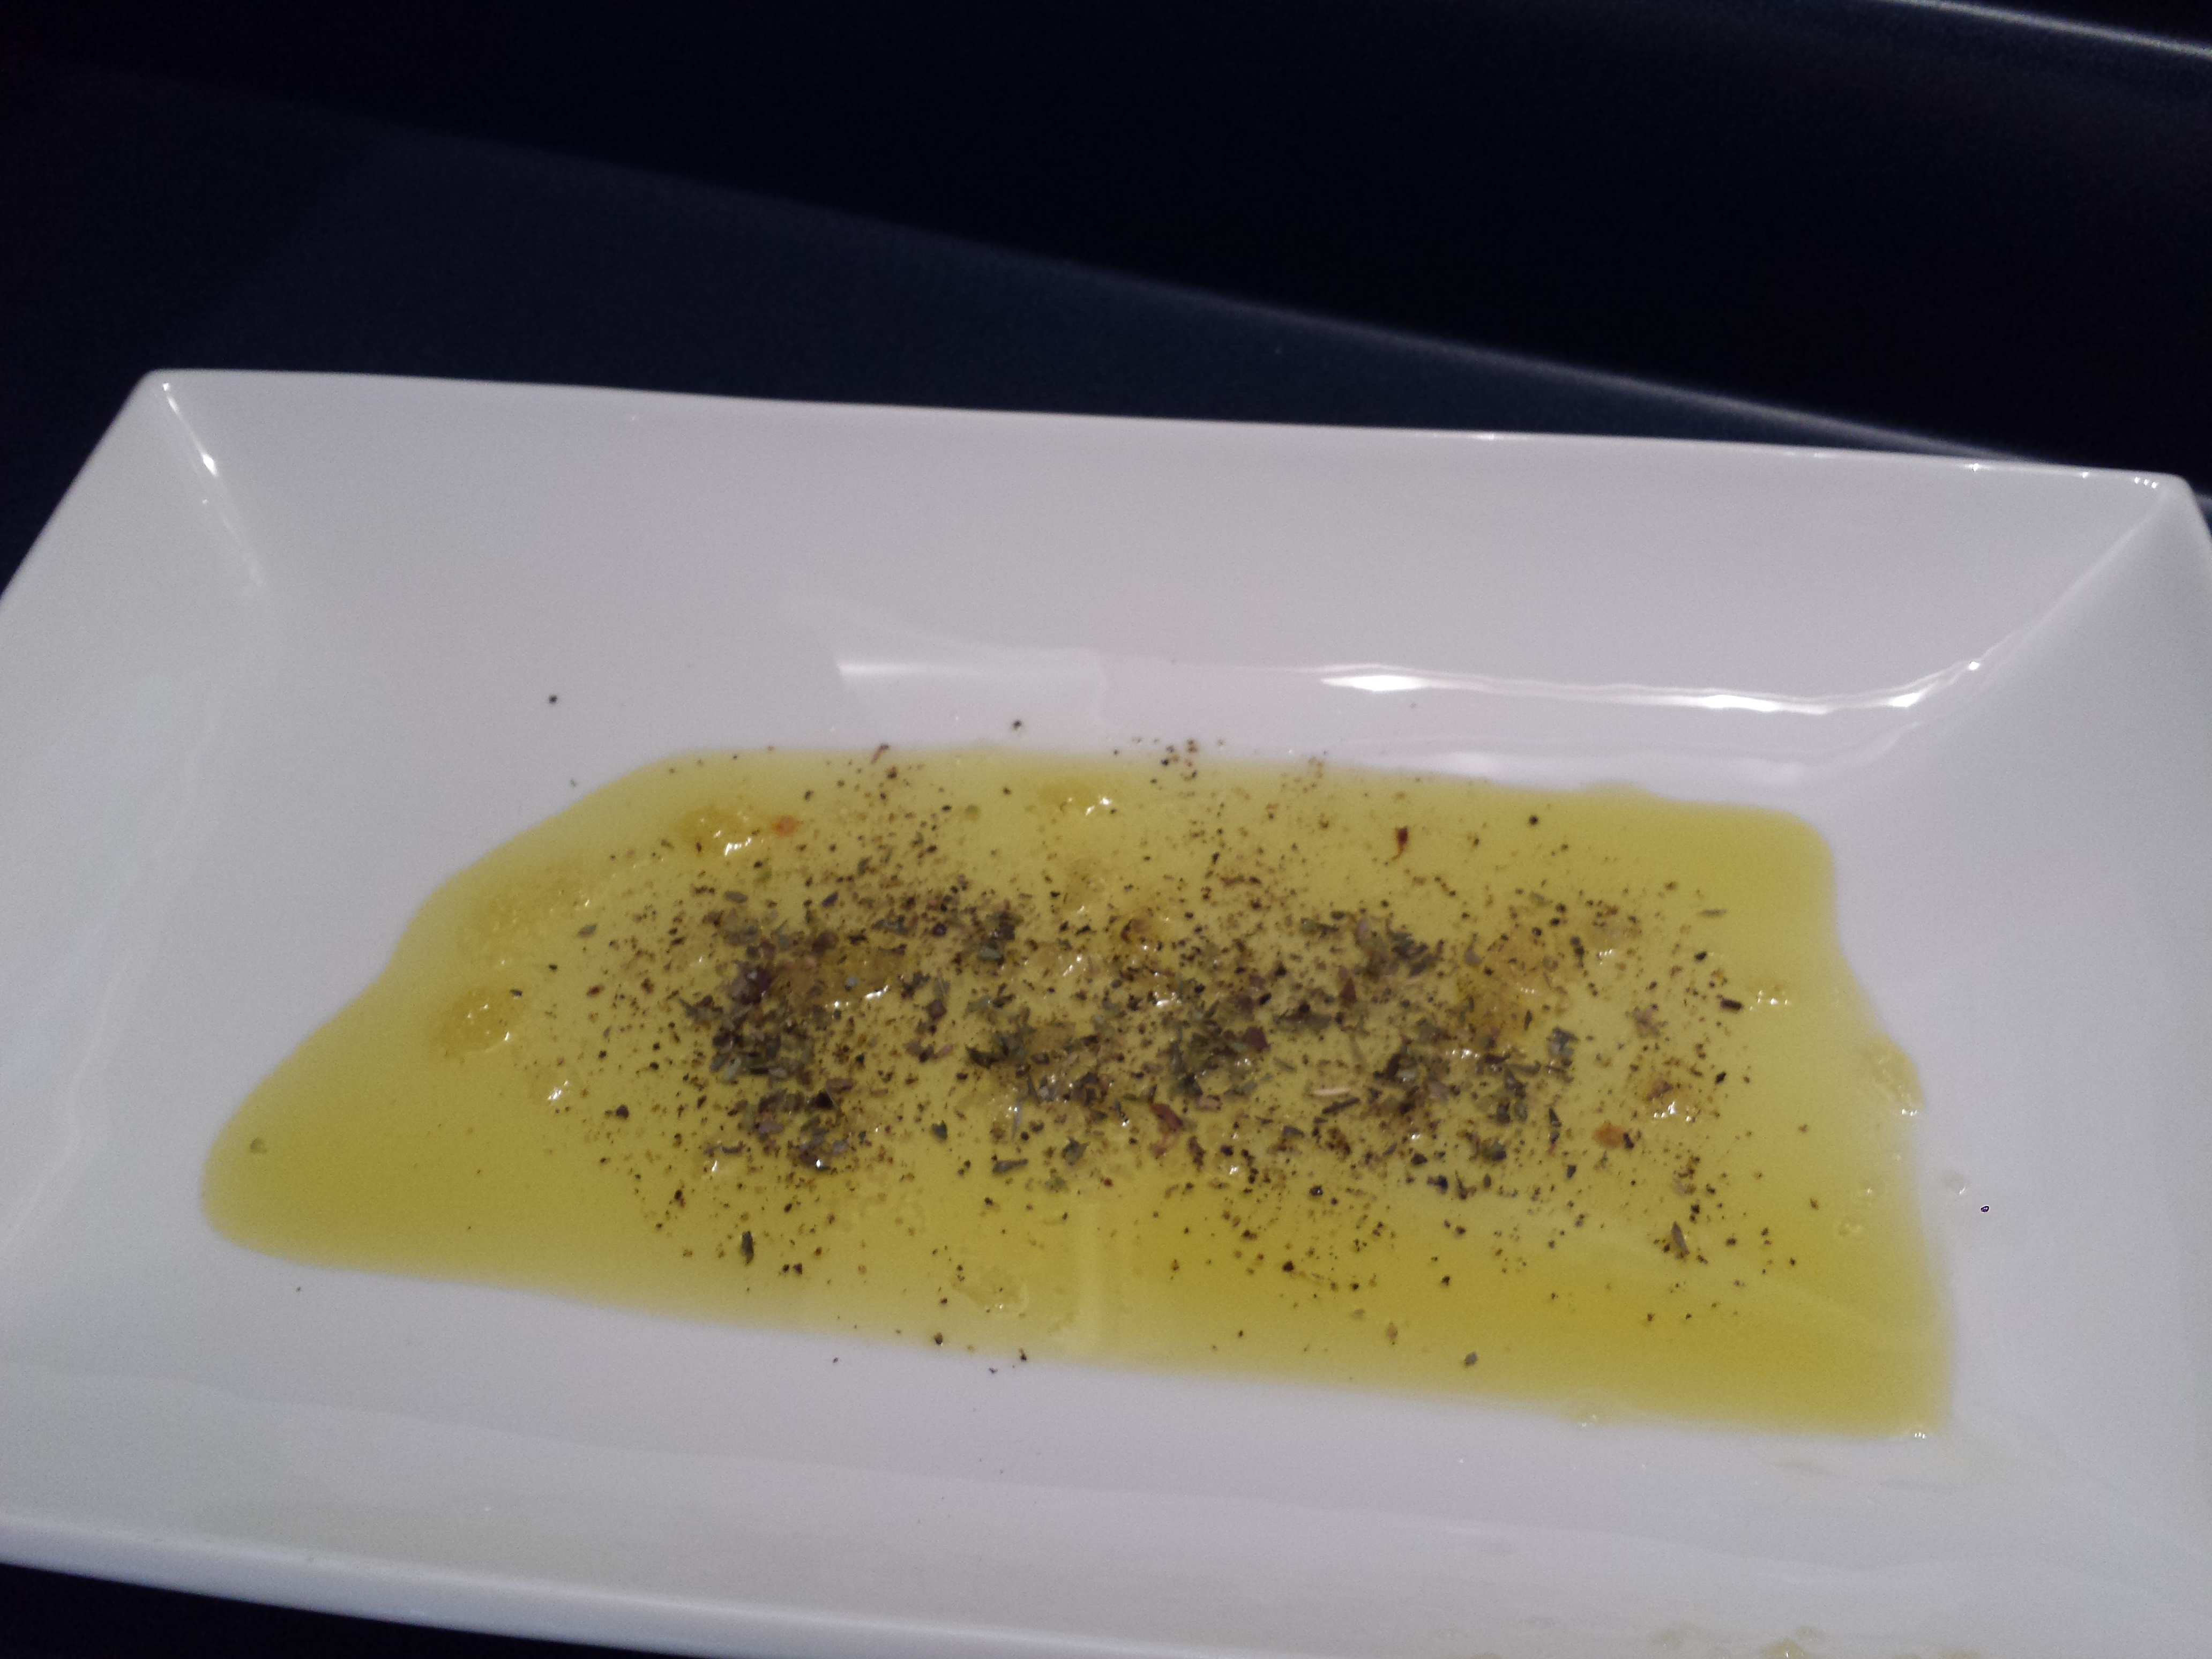
White Sauce

I know no other name for this sauce only that Nana called it White Sauce.  It is amazing, well how I remember it when Nana made it at least.  It has a texture and taste of nothing I have had before. To be honest, I could just use a spoon to eat it, forget the cake!

I started to take pictures then there was a quick change in our plans.  Half was made at home and half at Gramma and Poppa’s.  The part at Gramma and Poppa’s I forgot to take pictures

IMG_6750

IMG_6754

Annnnnd complete! haha

IMG_6755

When I was finished making the white sauce I had to try it.  There is a picture of me when I was about 6 with the whole bowl of sauce and me with a big spoon full in my mouth, I was caught!  That is how good it is!!  I just hoped it was as good as I remembered.

It was PERFECT!  I nailed it! It tasted just like Nana’s! I was thrilled.  At this point if the Pudding didn’t turn out at least we had bowls of sauce.  Into the fridge for a few hours until dessert.

Now time to re steam the Pudding. Yes, back in the pot (which I forgot to take pictures of again!) for 2 hours to heat and moisten.

We are full of an amazing turkey dinner – Gramma outdid herself.

20141225_183331

18 pound turkey for 7 people = lots of leftovers for me!!

20141225_170050

Dessert time!

I am very nervous about getting the Pudding out of the bowl. Even though I prepared my bowl, I fear it will stick.

It worked! A huge sigh of relief.

IMG_6764

Now to put it all together.

Mom, Dad, Gramma and Poppa had eaten Nana’s Pudding all those years ago, so they new what it was going to be compared to.  That’s a high standard!

IMG_6769

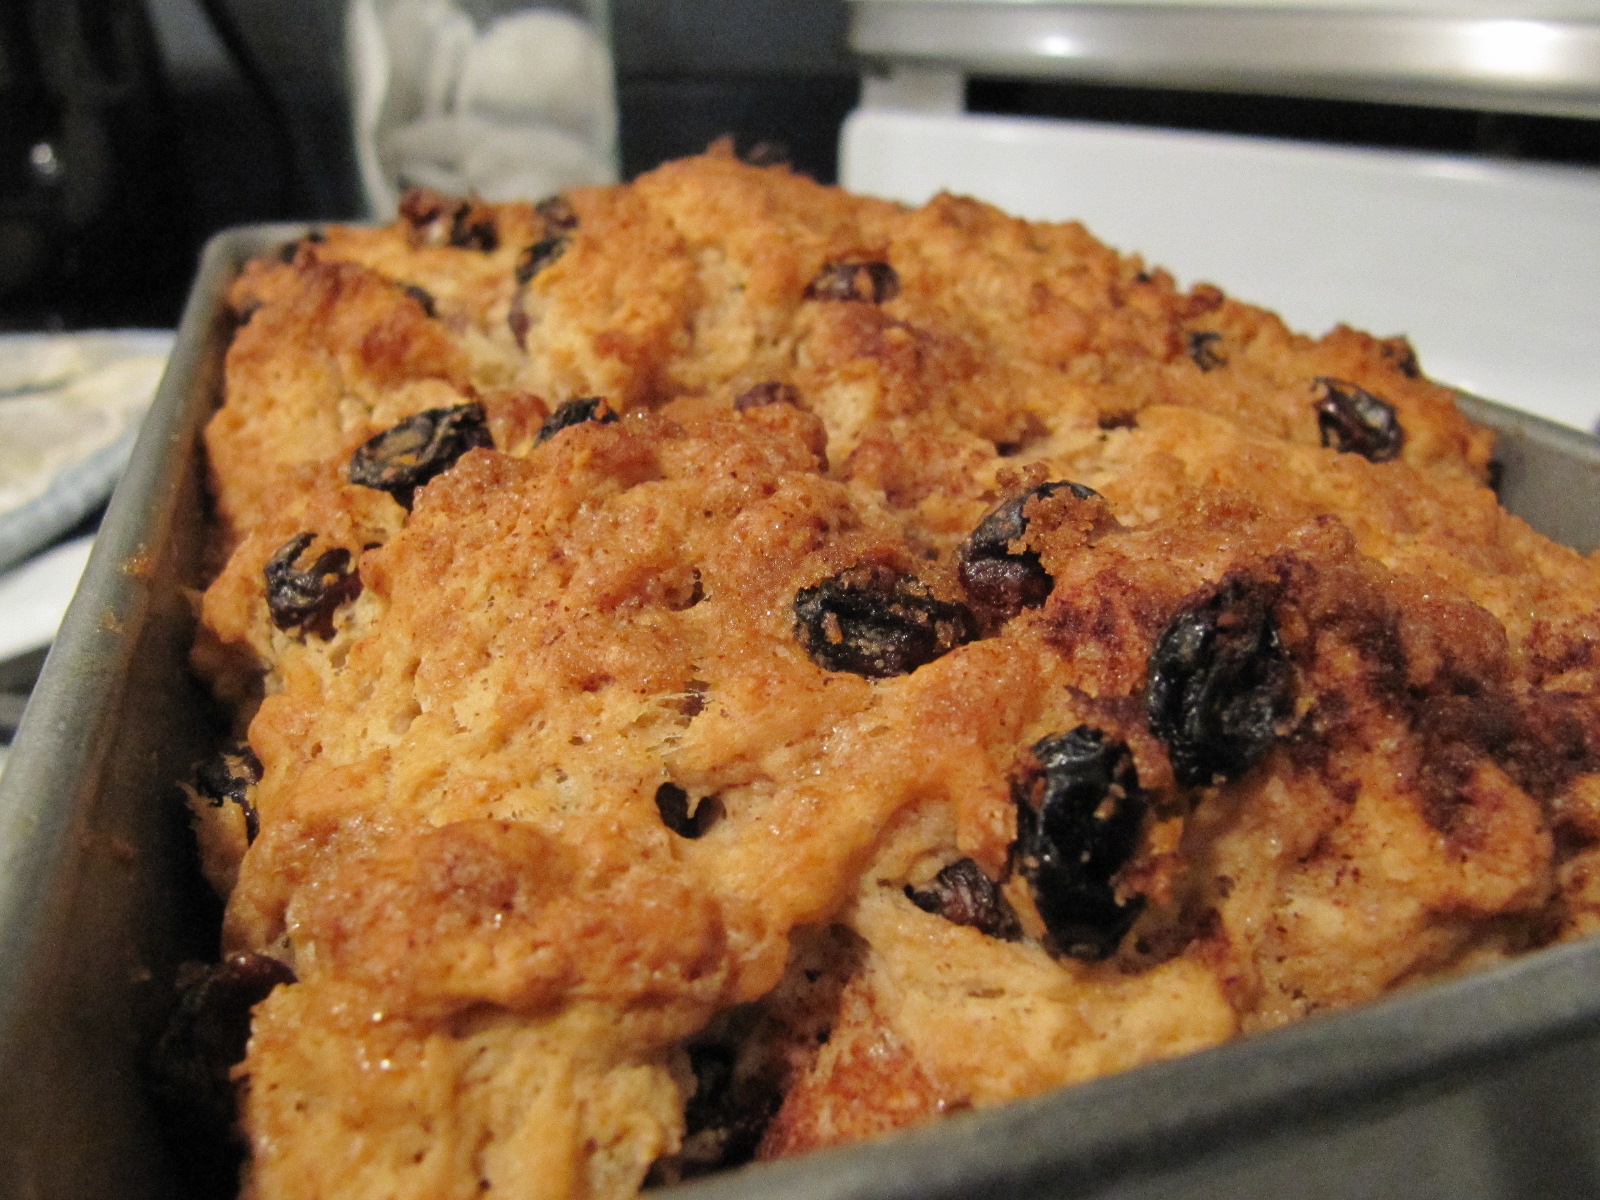
Look at that! It looks perfect

IMG_6773

One word- WOW

This WAS Nana’s Pudding! I could hardly believe it. It was perfect!

The looks on Mom, Dad, Gramma and Poppa’s faces said it all.  They loved it and said it tasted EXACTLY like Nana’s.

The warm moist Pudding combine with the cold creamy White sauce was amazing!

IMG_6776

Not everyone likes Pudding, but we love it. I am so glad it worked and I will definitely be making it again.  Poppa said, ‘we won’t have to wait til next Christmas for another one will we?’  I guess that means he liked it.

Most importantly, I am glad Dad liked it.  A wonderful way to carry on his tradition and keep Nana’s spirit alive at Christmas.

I will admit, just like when I was little, I sat down with a bowl of sauce and a spoon 😉

IMG_6755


Pecan Pie Cheesecake

IMG_6797

This Christmas I was determined to make something different for dessert.  I always do a cheesecake and something else as there are a few people who do not like cheesecake.  I racked my brains, searched my books, looked on the web and I was stumped.  There were so many things I liked but nothing that would please almost everyone.  I eventually decided to ask those attending dinner what they would like.  Everyone I asked responded with Cheesecake!  Okay, okay!  I certainly don’t mind making it, I just assumed people would be getting sick of it.  Apparently not.

Now to decide what flavour.  Suggestions were Turtle, Tuxedo, Plain, etc, all ones I had already made.  I like to try new things, then I can post about it, haha!  I headed to Pinterest, where I saw thousands of cheesecakes, but this one caught my eye.  Pecan.Pie.Cheesecake!

Photo from spicysouthernkitchen.com

Just look at that! Amazing!

pecan-pie-cheesecake-15

I eat with my eyes and as soon as I saw this I knew, this was the Christmas Cheesecake!  I had never made a Pecan Pie before, though it is on my bucket list, but figured I would give it a go.

Pecan Pie Cheesecake

Adapted from Spicy Southern Kitchen

Crust

1¾ cups vanilla-wafer crumbs**
¼ cup firmly packed brown sugar
⅓ cup butter, melted

**I used graham crumbs, not a fan of vanilla wafers

1. Preheat oven to 350 degrees.

2. Combine graham crumbs and brown sugar in a medium bowl. Stir melted butter in with a spatula.

IMG_6531

3. Press into the bottom and halfway up the sides of a 9-inch Springform pan.

IMG_6534

4. Bake for 6 minutes and let cool.

Pecan filling

1 cup sugar
⅔ cup dark corn syrup
⅓ cup butter, melted
2 large eggs
1½ cups chopped pecans
1 teaspoon vanilla extract

1. Combine all Pecan-Filling ingredients in a medium saucepan. (I left out the nuts, and poured them over the crust, only because if I messed up with filling I didn’t want to waste the expensive pecans)

IMG_6538

IMG_6542

2. Stir well and bring to a boil over medium-high heat. Reduce heat to maintain a simmer and cook, stirring continuously, until mixture thickens, about 8 to 10 minutes.

IMG_6544

4. Pour into prepared crust.

IMG_6546

At this point I am just about drooling, look at that!  Forget the cheesecake, lets cook this and eat it!

IMG_6548

Cheesecake filling

3 (8-ounce) packages cream cheese, softened
1¼ cups firmly packed brown sugar
2 tablespoons all-purpose flour
4 large eggs
⅔ cup heavy whipping cream
1 teaspoon vanilla extract

1. Reduce oven temperature to 325 degrees. (Seemed low to me, I went with340ºF)2. Using an electric mixer, beat the cream cheese at medium speed until smooth and creamy

IMG_6553

2. Add brown sugar and flour and beat until fluffy.

IMG_6554

I love the colour the brown sugar produced.  I had never thought of using brown sugar.  There are a few other ones I think this would be a nice addition to

IMG_6556

3. Add eggs one at a time, beating well after each addition. Use a rubber spatula to scrape down the sides of the bowl to make sure everything mixes evenly.

IMG_6557

4. Add cream and vanilla and beat just to combine. Pour mixture over pecan filling. – I was worried pouring the cheesecake over the pecan filling would create a whole and not a layer, but the pecan layer had hardened up enough to hold it

IMG_6558

IMG_6559

5. Place in oven and bake for 1 hour. Turn oven off but leave cheesecake in oven with door closed for 1 more hour. (I cooked mine in a water bath as I always do)

Perfection! No cracks!

IMG_6580

6. Remove cheesecake from oven and run a knife around the sides to make sure they are not sticking. Let cool completely. Refrigerate for at least 4 hours.

IMG_6587

The next day I spruced it up a little, nothing exciting or over the top.  Placed a few pecans around the edges as a hint of what kind of Cheesecake it was.

IMG_6723

Dessert time!  Finally time to try it!  I am quite nervous before cutting it.  I had read some of the comments and some were undercooked and the filling poured out.  Others overcooked their pie filling and was hard as a rock.  It may look pretty but you just never know.

IMG_6729

It was perfect!  It didn’t ooze out nor did it turn to a rock.

IMG_6732

This cheesecake was perfection!  I will admit, I am my own worst critic.  I always pick apart my desserts thinking something could be better or should have done this different.  Not with this one! This was perfect.   The pictures do not do it justice.

IMG_6733

As I was serving it up, I could hear ‘mmmm’, ‘wow’, ‘OMG Erica!’ ‘Your BEST cheesecake ever!’. At this point I had not tried it yet, I always serve myself last.  When I made sure everyone had dessert (there was also an apple crisp for those cheesecake haters) I served myself up a big piece.  I had a piece and a half, Dad can’t have nuts so he just at the top part, I got his pecan crust.

IMG_6736

OH.MY.GOD!

With one bite, i think I went to heaven.  As soon as the fork hit my mouth angles started singing.  Quite literally, it was a ‘party in my mouth’.  I felt like Clark Grisswold from Christmas Vacation when he finally got his lights to work…

Christmas-Vacation-Clark-Griswold-Lights

I seriously had to pause for a moment to take it all in.

IMG_6741

The creamy top layer of cheesecake was so smooth and decadent. I really liked the almost caramel flavour that the brown sugar added to the plain cheesecake.

A few photos from the next day on white plates looks better

IMG_6789

The pecan pie layer was simply amazing!  It was sinfully sweet! I could have just pulled up a big bowl of it and been happy.  It was a perfect consistency.  It almost put me in mine of a perfect butter tart.  I am glad I went with the graham crumb crust, it went perfectly.

IMG_6797

The combination of the creamy cheesecake balanced out the sweetness of the pecan pie filling and it was absolutely delicious! Everyone love it! I was told several times that this was their new favourite. Already had requests for a repeat and a few want the recipe.

I’d say it was a success!  My only complaint is that there was not more left over! haha

Thanks you Christin from Spicy Southern Kitchen for such a wonderful dessert, it was the perfect ending to a wonderful Christmas Eve meal.

Snickers Popcorn

20140717_192129

* Please excuse the look of this post!  Not sure what is wrong, but the spacing is not cooperating, everything looks crammed together*

Another recipe with Guest Baker Amy!  I love when my cousin Amy comes out to bake!  As mentioned in previous posts this days main focus was 2 cheesecakes but only one was accomplished, check it out here. We also attempted a caramel sauce, what a disaster you can see it here.

We decided on this recipe while we were in the grocery store buying the cheesecake ingredients.  We were going back to Amy’s place to have a nice dinner with both of our families.  We needed dessert, but it had to be something that was ‘no bake’ or stove top as the oven was busy with cheesecake!    Amy found this one on Six Sisters’ Stuff, it sounded delicious!

* Unless you are feeding a crowd (10+ people) I would half this recipe, it makes a lot!

Snickers Popcorn

4 quarts popped corn (about 1 cup kernels)
1 cup salted butter
2 cups light brown sugar, packed
1 tsp salt
1/2 cup light corn syrup
1 tsp baking soda
1 cup salted peanuts
30 fun size Snickers bars chopped up
3 oz melted chocolate chips
Directions
1. Preheat oven to 200 degrees.
2. Chop up Snickers bars into bite size pieces
20140717_160730
3.Pop your popcorn and put popcorn and peanuts in a big brown paper grocery bag. We didn’t have a paper bag, so we went with a big bowl and a pot
I had to go up to the attic to get the popcorn popper, had not used it in forever!  Popping the popcorn was a whole new adventure in itself, haha!
20140717_153953
It was like we were back in 1999 when I was babysitting her, we always had popcorn watching movies.  We were both watching it for the first kernel to pop!
20140717_153945
There it is! But do you notice a problem?
20140717_154044
As the popcorn started to shoot out the top of the popper we had kernels and popcorn all over, it was snowing popcorn!  No idea where the little lid/butter melter is.  We had to improvise ….
20140717_154131
4.  Seperate into bowls big enough to stir and add nuts
20140717_161918
5. Over medium heat boil butter, brown sugar, salt and corn syrup for 5 minutes (stirring constantly).
20140717_160101
20140717_160634
6. Remove from heat and stir in baking soda.
20140717_161928
7. Pour over popcorn and stir
20140717_162023
We gave it a try – it was a little soggy, yikes!
20140717_162321
8. After the popcorn is coated well, spread onto a cookie sheet. Spread chopped Snickers over top of popcorn and put in oven for 5 minutes.
20140717_162818
9. Remove from oven and drizzle melted chocolate over top of popcorn.
20140717_164426
Look at that!!!
20140717_164621
When it cake out of the oven it was nice and crunchy, way better than any caramel corn I had ever had.  In fact I don’t even like caramel corn.  This was amazing!
20140717_192120
The crunch of the baked caramel sauce and the sweet of nut chocolate were an excellent combination.  It wasn’t overpowering sweet at all (others mentioned as I never thing anything is too sweet).  It was a huge hit for dessert, not much left of the tray.  It was so addicting, we seriously couldn’t stop, had to move away from the table.
20140717_192139
I would definitely make this again.  The only thing I would change is the addition of salt.  My Uncle suggested as we were eating that it would be awesome with some salt.  He was right!  We put a few shakes on and it got even better!  The salt really enhanced the flavours and who doesn’t love sweet and salty things?  I would put it on just before the bake so it stuck to the popcorn.
Thanks for picking an awesome recipe, this one will definitely be a redo!
*If not eaten immediately…can be stored in an airtight container.