Banana Loaf

IMG_4763

When bananas look like this there is only one thing to do with them….BAKE! I love bananas, I eat one every day.  This time of year, summer, I am having a hard time keeping them from ripening so fast.  It seems like as soon as I buy them, two days later they look like this.  Anyone have any tips to slow down the ripening process? Covering the stems with foil did not work. Separating each banana did not work and they taste funny if you put them in the fridge, not sure what else to try.  Anyways, having bananas like this is always a great excuse to bake, wouldn’t want them to go to waste.

I like banana bread/muffins, real banana muffins.  I hate when you think you have a beautiful homemade banana muffin and your first bite all you can taste is that imitation banana ‘flavour’, YUCK!  To be honest I have yet to make a banana loaf, I have made Banana Cake many, many times, but this time I wanted more of a dense loaf, not a cake.  I looked on-line and there are thousands, but which one to try?  I asked a few people and the one Jen (guest baker) showed me looked the best.  She says it is delicious, so I gave it a try.

Banana Bread

from Simply Recipes

Ingredients

3 or 4 ripe bananas, smashed
1/3 cup melted butter
1 cup sugar
1 egg, beaten
1 teaspoon vanilla
1 teaspoon baking soda
Pinch of salt
1 1/2 cups of all-purpose flour

Directions:

1. Preheat the oven to 350°F (175°C).

2. Mash bananas in a large bowl

IMG_4767

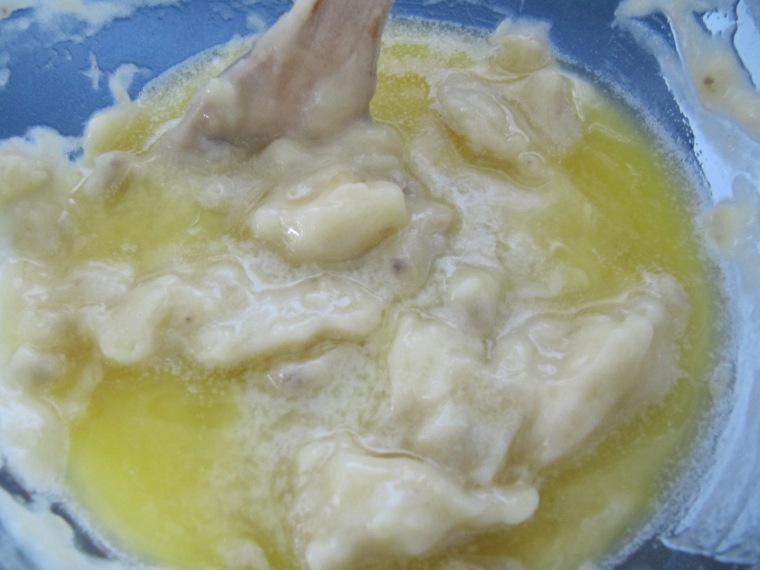
3. With a wooden spoon, mix melted butter into the mashed bananas in a large mixing bowl.

IMG_4768

4. Mix in the sugar, egg, and vanilla.

IMG_4769

5. Sprinkle the baking soda and salt over the mixture and mix in.

IMG_4771

6. Add the flour, mix.

IMG_4772

7. Pour mixture into a buttered 4×8 inch loaf pan.

IMG_4775

8. Bake for 1 hour. Cool on a rack. Remove from pan and slice to serve.

IMG_4784

This bread smelt so good while it was baking.  It tasted ok, not  a whole lot of flavour.  I must say I was not fussy on the texture, it was kind of spongy/rubbery.  Don’t think I’ll make this one again.

Daring Bakers make Quick Breads

The Daring Bakers’ February 2012 host was – Lis! Lisa stepped in last minute and challenged us to create a quick bread we could call our own. She supplied us with a base recipe and shared some recipes she loves from various websites and encouraged us to build upon them and create new flavor profiles.

I was excited to see this months challenge, Quick Breads.  I love quick breads, they are so easy and are quite similar to cake!

Quick bread is an American term used to denote a type of bread which is leavened with leavening agents other than yeast. Quick bread includes many cakes, brownies and cookies, as well as banana bread, beer bread, cornbread, biscuits, muffins, pancakes, scones, and soda bread.

When the challenge was announced I had huge ambitions!  I wanted to make several different flavours such as banana, lemon, chocolate, pumpkin, cheddar and beer.  Then I realized, if I make all those I will eat them all, and I don’t need that!  I decided I would go with one, a recipe that I remember my Mom used to make when I was little, zucchini bread.

Mom did not do much baking when I was growing up.  She is an amazing cook but had no interest in baking.  This recipe was one that I remember her making quite a few times, quick, easy and delicious!

Mom’s Zucchini Loaf

3 eggs
1 1/2 cups white sugar
1 cup oil
2 tsp vanilla
2 cups shredded, unpeeled zucchini
3 cups all-purpose flour
1 tsp baking powder
1 tsp baking soda
1 tsp salt
1 tsp salt 1 1/2 tsp cinnamon
1/2 tsp nutmeg
1/2 cup walnuts

Directions

1. Preheat oven 350 F

2. In a medium bowl combine flour, baking powder, baking soda, salt, cinnamon and nutmeg

3.  In a large bowl beat eggs well

4. Add sugar, oil and vanilla – beat

5. Stir in zucchini

6. Add dry ingredients  and nuts (I dont like big pieces of nuts in my dessert but I like the flavour so I grind mine up) –  stir

7. Divide into 2 8×4 loaf pans and bake 50-60 minutes or until tester comes out clean

8. Remove from pans and cool on rack

The loaf turned out beautiful!  The aroma coming from the oven while it baked was amazing, just how I remembered when I was young.  The loaf was moist.  The flavour combination was wonderful!  I’m so glad I decided to go with Mom’s loaf.  I had not had it in probably 15 years, but I can see making it again sometime soon!

Thanks Lis for a wonderful challenge!

Cheddar Shortbread Bites

I was having one of those days where I wanted to bake something, but lord knows I don’t need anything!  Sometimes I just get in the mood to bake, it seems to calm me, I find it very relaxing.  After mulling around a few ideas I asked Mom if she wanted me to make her something, muffins, scones whatever.  Initially she said no, but a few minutes later presented me with a recipe for a cheese shortbread.  That peaked my interest.  After looking at the very short list of ingredients we discovered that between the 2 of us we only had half of the recipe, so I used the cheese and spices I had, which are listed below.

Cheddar Shortbread Bites

1/2 cup butter softened

1 tsp sugar

1 cup sharp cheddar cheese, grated

1 cup flour

1 tsp  parsley

1/2 tsp paprika


Directions

1. Preheat oven to 350 F and cover a cookie sheet with parchment paper

2. Beat butter and sugar until well blended

3. Add cheese, mix well

4. In a separate bowl, mix flour and spices, add to cheese mixture, stir until well combine (I found I had to use my hands to mix it well)

5. Divide dough in half and roll, on a lightly floured surface, each half into a 9 inch log

6. Slice approx.  half-inch

7. Place on prepared cookie sheet

8. Bake until golden brown, mine took well over 30 minutes

9. cool on rack

These were very good!  Everyone liked them, I could see them being addicting, luckily they were shipped down to Mom’s. They were crispy, but almost tender in the middle.  The sharp cheese really gave it a punch.  I will definitely make these again and try a few different cheeses with different seasonings.  And perhaps get the ingredients to make the original recipe!


Cinnamon Swirl Bread

Snow day!!  We got a little over 6 inches of snow today, it was beautiful!!  I didn’t really want to go out as the roads were kinda slippery, so I figured what better way to spend a beautiful,winter, snowy day then in the kitchen filling the house with the wonderful aroma of cinnamon bread.

I wanted to make something but i didn’t know what, and because I really couldn’t go any where I had to make do with the ingredients that were in the house.  luckily,  I tend to have a lot of baking supplies on hand, so I had quite a few options.

After searching a few food blogs I decided to go with Cinnamon Swirl Quick  Bread.  It was not made from one recipe in particular, I kinda mixed a few together.

Cinnamon Swirl Quick Bread

1/4 cup butter, softened ( I must have read it wrong, I put 1 cup!, still worked great)
1 1/3 cups sugar, divided
1 egg
1 teaspoon baking powder
1/2 teaspoon baking soda
1/2 teaspoon salt
1 cup buttermilk
1 tablespoon ground cinnamon

Directions

1. Preheat oven to 350°F.
2. In a large mixing bowl, beat together butter, 1 cup sugar, and egg.
3. Combine the flour, baking powder, baking soda, and salt.  ** I added an extra heaping teaspoon of cinnamon into the batter, we like things very cinnamony here!**
4. Add the flour mixture to the egg mixture alternately with the buttermilk.
5. In a small bowl, combine the cinnamon and remaining 1/3 cup sugar.
6. Pour a third of the batter into a greased 8X4X2-inch loaf pan.

7. Sprinkle a third of the cinnamon sugar on top of batter.

8. Repeat layers twice.

9. Bake for 45-50 minutes, until a toothpick inserted near the center comes out clean.
Cool in pan for 10 minutes.
Remove from pan to a wire rack to cool completely.
This was quite good.  I will definitely make it again.  Mind you next time I will omit the 3/4 of a pound of butter that I didn’t really need.