Snickers Popcorn

20140717_192129

* Please excuse the look of this post!  Not sure what is wrong, but the spacing is not cooperating, everything looks crammed together*

Another recipe with Guest Baker Amy!  I love when my cousin Amy comes out to bake!  As mentioned in previous posts this days main focus was 2 cheesecakes but only one was accomplished, check it out here. We also attempted a caramel sauce, what a disaster you can see it here.

We decided on this recipe while we were in the grocery store buying the cheesecake ingredients.  We were going back to Amy’s place to have a nice dinner with both of our families.  We needed dessert, but it had to be something that was ‘no bake’ or stove top as the oven was busy with cheesecake!    Amy found this one on Six Sisters’ Stuff, it sounded delicious!

* Unless you are feeding a crowd (10+ people) I would half this recipe, it makes a lot!

Snickers Popcorn

4 quarts popped corn (about 1 cup kernels)
1 cup salted butter
2 cups light brown sugar, packed
1 tsp salt
1/2 cup light corn syrup
1 tsp baking soda
1 cup salted peanuts
30 fun size Snickers bars chopped up
3 oz melted chocolate chips
Directions
1. Preheat oven to 200 degrees.
2. Chop up Snickers bars into bite size pieces
20140717_160730
3.Pop your popcorn and put popcorn and peanuts in a big brown paper grocery bag. We didn’t have a paper bag, so we went with a big bowl and a pot
I had to go up to the attic to get the popcorn popper, had not used it in forever!  Popping the popcorn was a whole new adventure in itself, haha!
20140717_153953
It was like we were back in 1999 when I was babysitting her, we always had popcorn watching movies.  We were both watching it for the first kernel to pop!
20140717_153945
There it is! But do you notice a problem?
20140717_154044
As the popcorn started to shoot out the top of the popper we had kernels and popcorn all over, it was snowing popcorn!  No idea where the little lid/butter melter is.  We had to improvise ….
20140717_154131
4.  Seperate into bowls big enough to stir and add nuts
20140717_161918
5. Over medium heat boil butter, brown sugar, salt and corn syrup for 5 minutes (stirring constantly).
20140717_160101
20140717_160634
6. Remove from heat and stir in baking soda.
20140717_161928
7. Pour over popcorn and stir
20140717_162023
We gave it a try – it was a little soggy, yikes!
20140717_162321
8. After the popcorn is coated well, spread onto a cookie sheet. Spread chopped Snickers over top of popcorn and put in oven for 5 minutes.
20140717_162818
9. Remove from oven and drizzle melted chocolate over top of popcorn.
20140717_164426
Look at that!!!
20140717_164621
When it cake out of the oven it was nice and crunchy, way better than any caramel corn I had ever had.  In fact I don’t even like caramel corn.  This was amazing!
20140717_192120
The crunch of the baked caramel sauce and the sweet of nut chocolate were an excellent combination.  It wasn’t overpowering sweet at all (others mentioned as I never thing anything is too sweet).  It was a huge hit for dessert, not much left of the tray.  It was so addicting, we seriously couldn’t stop, had to move away from the table.
20140717_192139
I would definitely make this again.  The only thing I would change is the addition of salt.  My Uncle suggested as we were eating that it would be awesome with some salt.  He was right!  We put a few shakes on and it got even better!  The salt really enhanced the flavours and who doesn’t love sweet and salty things?  I would put it on just before the bake so it stuck to the popcorn.
Thanks for picking an awesome recipe, this one will definitely be a redo!
*If not eaten immediately…can be stored in an airtight container.

Caramel Sauce

Another recipe with Guest Baker Amy!  Amy was out making cheesecakes.  As the first one was in the oven, check it out here, we started the caramel sauce needed for the second cheesecake.

Being in an adventurous mood I thought we would try making homemade caramel sauce.  I read many recipes and watched several videos, it looked really easy.  Very few ingredients and very little work.  All the recipes seemed to be quite similar, but I decided to go with one from ‘A Teaspoon and A Pinch‘.

When purchasing all of our ingredients, I did get a jar or caramel sauce ‘just in case’ things went terribly wrong.  We were optimistic we wouldn’t need it though.

Vanilla Bean Caramel Sauce

1 c. sugar
1¼ c. heavy cream
¼ tsp. coarse salt or sea salt
1 tsp. vanilla extract or vanilla bean paste
1 Tbsp. unsalted butter, optional

1. Measure out the heavy cream in a liquid measuring cup and add vanilla bean paste.  Microwave for one minute and set aside.

20140717_144931

2. Spread the sugar in an even layer over the bottom of a large, heavy-bottomed saucepan. Place over medium-low heat, watching carefully.

We both watched the pot of sugar quite curiously as we did not believe it would melt down.

20140717_144751


3. When the sugar begins to liquify around the edges, use a heatproof spatula or wooden spoon to gently stir it towards the center. Continue stirring very gently until all the sugar is melted, taking care not to over stir or allow sugar to clump up

I will admit we got very excited at the sight of liquid forming, we didn’t believe it would happen.

20140717_145238

Mine did not liquify around the edge, it did so in the centre, then clumped.  This didn’t happen in any of the videos I watched!  I am thinking I am glad we bought the jar of sauce!

20140717_145612

It stayed like this for quite some time before all the sugar melted

20140717_145952

4. Once the caramel reaches a deep amber color, immediately remove the sauce pan from the heat.  We were optimistic, it was looking and smelling wonderful!

20140717_150454

5. Carefully and quickly, stir in half of the heavy cream.

20140717_150458

6. The mixture will steam and bubble violently. Stir until the cream is well incorporated

*this is when things start to go down hill rather quickly!

In the original recipe the author posts pictures and comments about what to do if the caramel hardens…

20140717_150500

Of course mine did!! A giant clump of candy in a discoloured milky soup, mmmmm delicious!  Blah!

20140717_150553

I followed the disaster directions which basically said to bring back to the heat and stir until the clump dissolved, which it did.  We are optimistic once again!

20140717_150627

7. Stir in the remaining cream. Stir in the salt and optional butter. If any sugar has hardened, place the saucepan over low heat and whisk until smooth. Store in an airtight container in the refrigerator. If needed, it can be rewarmed in the microwave or in a saucepan over low heat.  Makes 1 1/2 cups.

20140717_151020

This looks nothing like the original recipe (or any other that I looked at)


20140717_165417

It is grainy and gloopy,not runny at all.  IT was like lava, so we allow it to cool


20140717_165432

When it had cooled enough to taste, I grabbed to spoons and we dug right in.

As I am tasting mine I glance over at Amy, she was wincing in pure disgust! It was quite funny.  It was horrible!  This time it is not just me being hard on myself wanting it to be perfect, it was awful!  Amy agreed.  Amy made a good point, she said usually you can eat a dessert maybe a comment about it being too dry, not sweet enough, but this is disgusting and inedible! (something to that effect anyway)

It went directly into the garbage! Ewww

Thank goodness I bought the backup jar of sauce 😉

Oreo Cheesecake

20140717_140628


The weather has been fantastic for baking the past 2 weeks, low 20’s Celsius and no humidity!

On Thursday my cousin Amy came out to bake, I love having someone to bake with.  Our plan was to make 2 different cheesecakes and share them, we each picked a flavour.  We started with Amy’s selection, Oreo Cheesecake.  This is one I had been wanting to try for a very long time.  We went with the original base I always use and just added to it.

20140717_140518

We both commented on how we really don’t like Oreo’s, but liked them in things.  I would never buy a bag of Oreo’s just to eat, I find them very boring, but put them in something like, cheesecake or ice cream and they are great!    Well, to be fair I don’t buy any cookies, if I want a cookie I make them.

Oreo Cheesecake


Chocolate Cookie Crumb Crust

1 1/4 cups Chocolate Cookie Crumbs
1/4 cup butter, melted
3 tbsp sugar

Combine crumbs, sugar and melted butter and press into a spring-form pan.

Bake the crust at 350º F for approx 10 minutes.   Set aside to cool.

*** Now is a good time to waterproof your spring from pan for the water bath.

img_2518

This picture is from a previous cheesecake.  This time I bought heavy duty wide foil, leak proof!

I have made some small changes (not noted, somethings just have to be a secret) over the years to make it just right for me, but I still basically follow the recipe I got way back when I started with the Daring Bakers


Cheesecake:

I did not take pictures of the first part of the recipe, kind of forgot.  For step by step photos please see steps 4-7 here (sorry!)

3 sticks of cream cheese,  room temperature
1 cup sugar
3 large eggs
1 cup heavy cream
1 tbsp. vanilla extract (or the innards of a vanilla bean)
1 bag Oreo Cookies
4 oz semi sweet chocolate

DIRECTIONS:
1. Preheat oven to 350ºF . Begin to boil a large pot of water for the water bath.

2. In a double boiler slowly melt chocolate – set aside to cool

img_2864

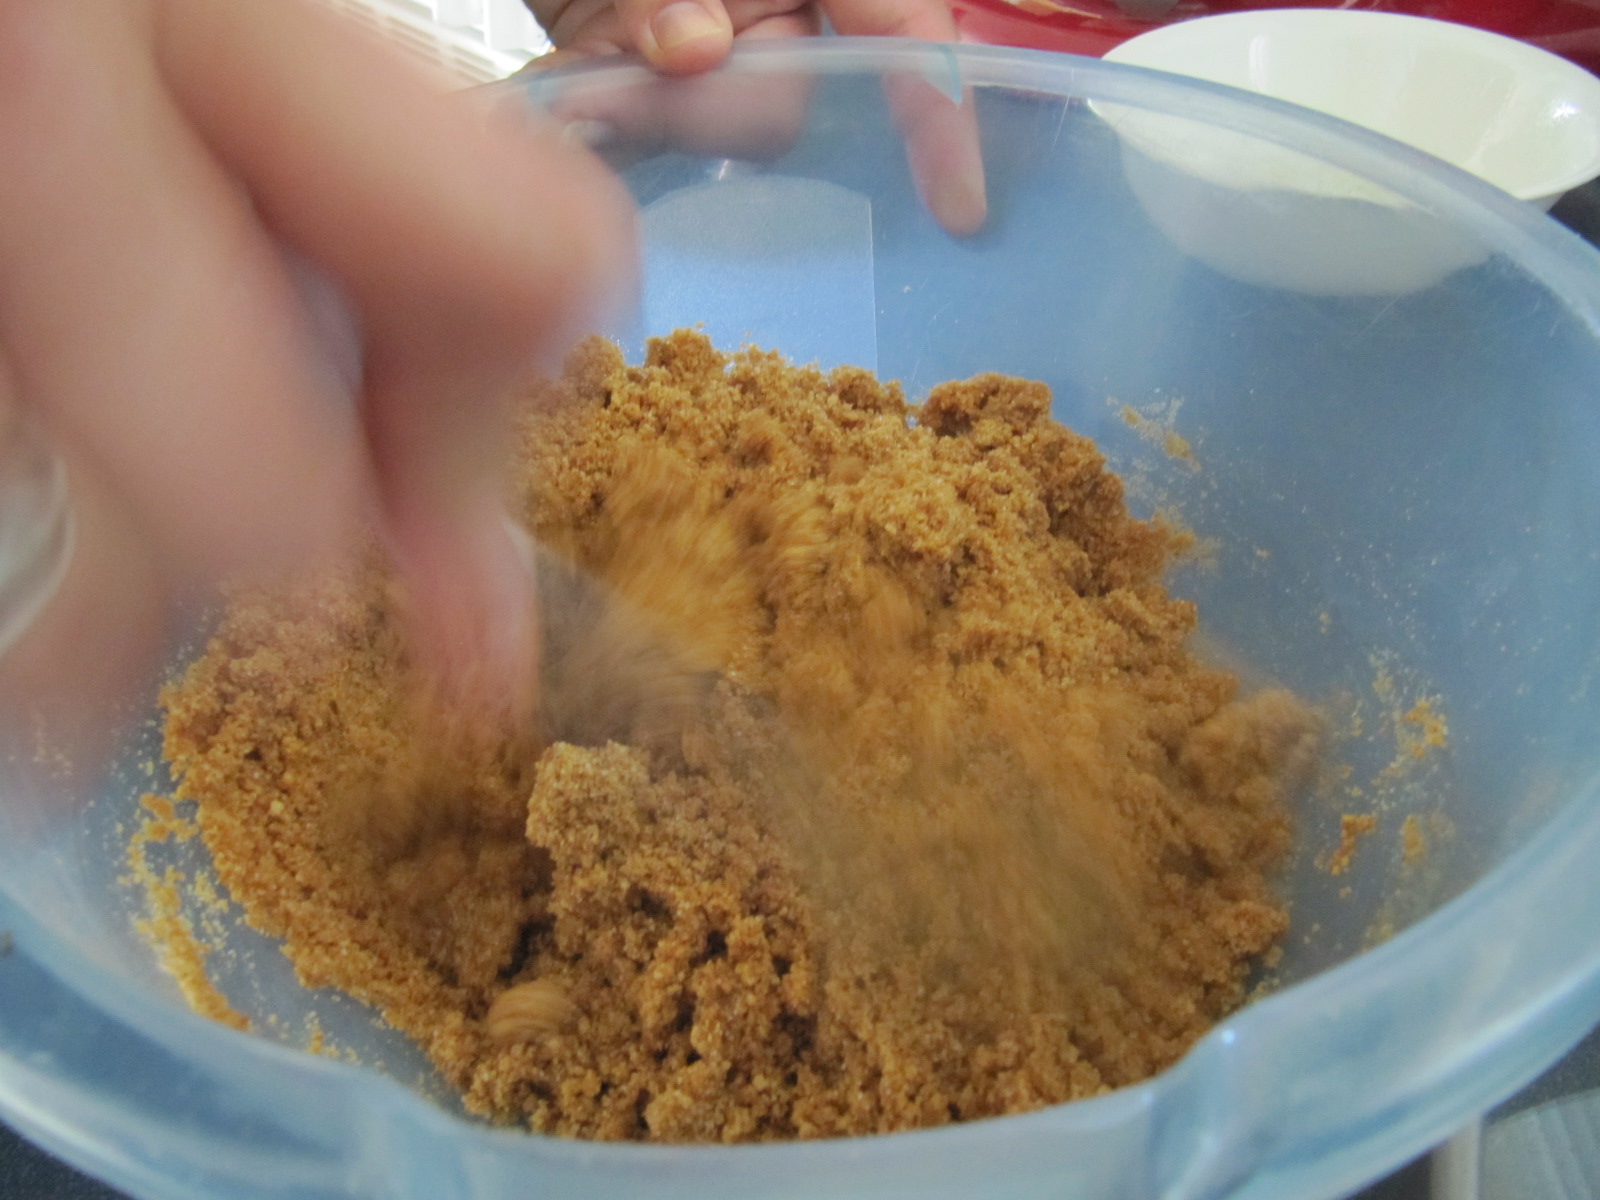
3. Before you start on the cheesecake batter prepare your Oreo Cookies.  We smashed them with a meat wacker in a large baggie. Careful, the teeth on the meat wacker (I am sure there is a better name for it?) will pierce the bag!

20140717_140722

4. Combine cream cheese and sugar in the bowl of a stand-mixer (or in a large bowl if using a hand-mixer) and cream together until smooth. Add eggs, one at a time, fully incorporating each before adding the next. Make sure to scrape down the bowl in between each egg. Add heavy cream, vanilla, lemon juice, and alcohol and blend until smooth and creamy.

5. Add the cooled chocolate and stir to combine

20140717_141004

20140717_141648

6. Stir in Oreo’s

20140717_141731


7. Pour into prepared spring form pan

20140717_141950

20140717_142033

8. Place in a large roasting pan and fill with boiling water 3/4 the way up the cheesecake pan

20140717_142239

9. Bake 45 to 55 minutes, until it is almost done – this can be hard to judge, but you’re looking for the cake to hold together, but still have a lot of jiggle to it in the center. You don’t want it to be completely firm at this stage. Close the oven door, turn the heat off, and let rest in the cooling oven for one hour. This lets the cake finish cooking and cool down gently enough so that it won’t crack on the top. After one hour, remove cheesecake from oven and lift carefully out of water bath. Let it finish cooling on the counter, and then cover and put in the fridge to chill. Once fully chilled, it is ready to serve

*****First time EVER mine cracked!!!!

20140718_142537

I was furious!  Amy was trying to tell me it was ok, but seriously I was angry!  Why would it crack It has never happened before.  I stuck a knife down the crack to see what was going on and it was like soup! Raw!  NOOOOOOO!  Now I really start to panic.  Is it ruined? Did we waste all those ingredients? God help me if this has to go in the garbage!

Started boiling the water again and back into the oven it went for another hour!  Not even sure if it was possible to recook, especially after it had cooled in the oven for over an hour, but at this point it was our only option!

At this point we abandon the second cheesecake as we just didn’t have time.  We were heading back to Amy’s for a lovely dinner with our families.  If we would have done the second cheesecake dinner would have been about 9pm.

Because we were so far behind, as soon as ‘we thought’ the cheesecake was done we turned it off and headed in to dinner.  It would cool down in the oven and be fine until i got back home.  I was still furious and worried that it was not going to turn out.

When I got home I took it out of the oven and did the knife test again, in the giant crevasse (still annoys me that it cracked!) it was firm but still not completely solid.  I put it in the fridge and would deal with it in the morning.

The day got busy and plans changed, I did not get to it until later in the evening.  I took it out of the spring form pan, strictly to see if it held it shape.  It did!


20140718_142911

I quickly put it back on and went to deliver it.  When I got there, I was going to leave the whole thing, but they insisted I take half.

I took the ring off again and started to cut it, praying that it was not a soupy centre…I must have looked very concerned, my Aunt and Uncle were laughing at me, saying it would be fine that I set my standards too high.  I said at this point my standards are “cooked!” As it was raw the first time.   I cautiously cut into it….

Success!

It was firm and cooked!

YAAAY!!

I completely forgot about pictures I was just so excited it turned out!  We all had a forkful and agreed it was a success! Whew!  What a relief, I would have gone crazy if I had to put that in the garbage!

When I got home I did remember to take a picture

20140718_193313


It was quite delicious.  I would make an Oreo Cheesecake again.  I was really impressed how the Oreo pieces stayed throughout the cheesecake, unlike the chocolate chip one I made where they all sank.

Despite the near disaster, I had a great day baking with Amy, we will have to do it again to do the second cheesecake….stay tuned!


Classic Cheesecake with Raspberry Sauce

20130717_190317

Mmmmm, Cheesecake!  I have yet to meet one that I didn’t like.  This week I had the pleasure of baking with my cousin Amy.  We baked together, hmm let me think, like 7 years ago and made a bunch of Christmas treats.  Not many people I know, well only one other…Guest Baker Jen, like to bake so I was quite excited at the opportunity to bake with someone.

Amy wanted to make cheesecake, heck yes! I love cheesecake!  Usually when I make cheesecake I load it up with a bunch of chocolate, caramel, peanut butter and anything else I can add to make it ooey and gooey and ever so sinful!  As wonderful as those are Amy wanted to make Classic Cheesecake with Raspberry Sauce.  A plain cheesecake, this is something I have never done, but was up for the challenge.  The cheesecake recipe I always use is from way back when I started The Daring Bakers, it was my first challenge, Abby’s Infamous Cheesecake.

Abbey’s Infamous Cheesecake:

Crust:
2 cups / 180 g graham cracker crumbs
1 stick / 4 oz butter, melted
2 tbsp. / 24 g sugar
1 tsp. vanilla extract

DIRECTIONS:
1. Preheat oven to 350 degrees F

2. Begin to boil a large pot of water for the water bath.

3. Mix together the crust ingredients. We like a lot of crust and like it to come up the sides of the cheesecake so we doubled the crust recipe

IMG_4817

4. Press into your preferred pan.

IMG_4819

5. Bake at 350 °C for approx 8 minutes, set aside to cool

IMG_4820

Cheesecake:
3 blocks of cream cheese, room temperature
1 cup sugar
3 large eggs
1 cup heavy cream
1 tbsp. lemon juice
1 tbsp. vanilla extract
1 tbsp liqueur, optional, but choose what will work well with your cheesecake

Directions:

1. Combine cream cheese and sugar in the bowl of a stand-mixer and cream together until smooth.

IMG_4821

2. Add eggs, one at a time, fully incorporating each before adding the next. Make sure to scrape down the bowl in between each egg.

IMG_4822

3. Add heavy cream, vanilla, lemon juice, and alcohol and blend until smooth and creamy.

IMG_4823

4.  If cheesecake pan is not airtight, cover bottom securely with foil before adding water.

IMG_4825

**Forgot to take pictures of the last few steps….**

5. Pour batter into prepared crust and tap the pan on the counter a few times to bring all air bubbles to the surface.

6. Place pan into a larger pan and pour boiling water into the larger pan until halfway up the side of the cheesecake pan.

7. Bake 45 to 55 minutes, until it is almost done – this can be hard to judge, but you’re looking for the cake to hold together, but still have a lot of jiggle to it in the center. You don’t want it to be completely firm at this stage. Close the oven door, turn the heat off, and let rest in the cooling oven for one hour. This lets the cake finish cooking and cool down gently enough so that it won’t crack on the top. After one hour, remove cheesecake from oven and lift carefully out of water bath. Let it finish cooling on the counter, and then cover and put in the fridge to chill. Once fully chilled, it is ready to serve.

IMG_4835

A & E Raspberry Sauce

This was our own creation!  We had no idea what we were doing.  I suggested that we write down what we did as we went along, just in case it turned out well.  With all the additions, this was our final measures

1/2 cup water
14 oz fresh raspberries
1/2 cup sugar
2 tbsp cornstarch

Directions:

1. Combine in a small sauce pan

IMG_4830

2. Heat on medium low and bring to a simmer

IMG_4832

3. Combine cornstarch with 3 tbsp of cold water and stir until all lumps are dissolved

4. Pour cornstarch into simmering sauce

5. Bring to a boil for 1 minute, stirring often

6. Allow to cool

IMG_4839

Now the hard part, waiting until the next day to eat it!!!  As it was still warm when Amy took it home I was not able to try it, this is what it looked like when it left, deconstructed if you will…

IMG_4838

And THIS is what it looked like when assembled

20130717_190324

The next day I was able to try it, WOW it was amazing!  The cheesecake was so creamy and had a slight tang to it, brought your taste buds to life.  The raspberry sauce was a success!  I’m glad we wrote it down because it was excellent!

With a review of “Absolutely the most delicious thing I have ever eaten” AK, I think we did ok! 🙂

This is why I love baking with others and baking things other people ask for, I get a chance to make things that I normally would not.  I am so glad I did, this cheesecake was amazing and I will be making a Classic Cheesecake again!

Along with the cheesecake we also made Banana Chocolate Chip Cupcakes with Cream Cheese Icing.  We used the recipe for my Banana Chocolate Chip Cake and a simple cream cheese icing

IMG_4829

I had a great time baking with Amy, and hope that it is not another 7 years before we do it again!

Thanks, Amy

Raisin Pie with Gramma

IMG_3515

Cross this one off the Bucket List, I made Gramma’s Raisin Pie!  I have wanted to do this for a long time.  I am not a pie fan, there are only 2 kinds of pie that I really care for, raisin and pecan.  Both of these pies are super sweet and delicious!  The reason I don’t like pie is because if I am going to have dessert, I want something ooey and gooey, not fruit, and most pies are fruit.

Raisin pie is not something you see very often, infact I have never seen raisin pie anywhere other than Gramma’s.  It must be out there somewhere though because many people say they don’t like it, who knows? I can remember having Gramma’s raisin pie when I was very little.  Gramma  always had pie around, home-made from scratch pies, raisin was my favourite.  Not a whole lot of people like it so she didn’t make it that often, but when she did I was always sure to get a piece.  I think it was only Poppa, Gramma, Mom , Dad and I who like it.

Each time Gramma made one I would always say “you have to show me how to make your pie”.  For years we always agreed that we would get together and make it but never did, until today!  I made a point of setting up a date over Christmas holidays to go to Gramma’s and make pie.  Gramma already had the pie crust made, it just needed to be rolled (by the way, you will never have a better crust then Gramma’s).

So now the bad news…

This recipe is a secret!  You can get a visual and some of Gramma’s tips for a great pie, but the recipe is top secret!  Sorry!

Gramma’s Raisin Pie in Pictures

1. Rinse raisins

IMG_3467

2. Combine ingredients in medium pot

IMG_3471

The spice

IMG_3472

3. Simmer on low to cook raisins

IMG_3489

While it’s cooking we moved onto the crust.  Gramma already had a bunch of her dough already made up, check it out, mine has NEVER looked like this!

IMG_3487

IMG_3477

4. ** Tip #1 from Gramma** Prepare your pan for the dough.  Lightly butter your pie plate. Makes the crust brown up AND it doesn’t stick!

IMG_3473

5. ** Tip #2  from Gramma** Getting the dough into the pie plate.  I always struggled with this, I would try to roll the dough around the rolling pin, and try to quickly move it over to the plate, usually ripping along the way and I would have to patch it all together.  Gramma did this, my mind was blown!

Fold twice as you see…

IMG_3481

IMG_3482

Transfer to pie plate and unfold

IMG_3483

IMG_3484

Voila! Perfect, no rips, no patching! Mind blowing….it’s the little things that amuse me 🙂

Trim and wait for filling to be ready

IMG_3488

6. Back to the raisins…bring the simmer to a boil and add the ‘secret ingredient’

IMG_3491

7. Remove from heat – set in sink of cold water to cool

IMG_3494

8. Once cool pour in your prepared shell

IMG_3500

9. **Tip #3 from Gramma** Use a lattice top and a runny pie will never run over! Cover with lattice top

IMG_3502

IMG_3503

10. Bake until golden

IMG_3505

Perfect!

IMG_3506

Delicious filling still bubbling

IMG_3509

Completed two amazing pies.  We did one together to show me how, then I made one and asked questions as needed.  Look how well they turned out!  Had a great teacher 🙂

IMG_3510

Hours later at home when cooled it was time for the tasting….

IMG_3518

Look at that!  Perfect!  The filling was delicious.  Raisins were plump, sauce was every so sweet with a hint of spice. The consistency was spot on.  Not too thick, not too runny, just right.

IMG_3517

The crust was perfect and rich and flaky.  The combination of the two are out of this world!

IMG_3513

I have made the perfect pie.  If I never make another kind of pie in my life it’s ok, because I can make a killer raisin pie!

Thank you Gramma for a great day and taking the time to show me your amazing recipe.  I will be making this for many more years to come!

On a side note, I was search to see if there was anything similar to Gramma’s recipe I came across something crazy!  There is someone out there who loved raisin pie as much as me.  This person loved it so much they wrote a song about it! HAHA.  Kinda silly yet funny, check it out here

Spanakopita/Tiropita

This summer friends of Mom and Dad’s moved onto our road, great people and they make wonderful food!  We have been very fortunate to receive a few wonderful Greek dishes over the past few months.  I have had a lot of tzatziki in my day but theirs, by far, is the best ever! I have no idea how they make it, nor do I want to know, because it would never be the same if I were to try to make it.  It is simply amazing!  Another wonderful delight they make is spanakopita, delicious!  Mom had helped them make a batch one day, so today we thought we would try a batch ourselves!

I kept saying we were making spanakopita, I had always thought that was what they were, but Mom corrected me, what we made was more of a tiropita.  Tiropita is made with layers of buttered phyllo and filled with a cheese-egg mixture where as spanakopita is layers of buttered phyllo with a spinach, onions and a cheese-egg mixture.  Ours was somewhere in-between, mostly cheese with a little spinach, perhaps a ‘Spanatiropita’?

“Spanattiropita”

Let me start by apologizing, there are no measurements.  Mom just ‘adds’ until it is right. So I will guess how much we used, approximate…

Phyllo pastry 2 packages
Spinach (1/2 package of frozen) drained and squeezed dry
Feta cheese (2 cups)
Ricotta cheese (1 cup)
Parmesan cheese (2 cups)
Greek seasoning (1 tsp)
4 eggs
Butter (half pound)
Directions:

1. In a large bowl add eggs and ricotta

2. Add  feta and parmesan, stir

3. Add spinach

4. Add seasoning and combine well

5. At this point you need to prepare your phyllo.  Phyllo is very fussy, you will need to follow the boxes directions on thawing, usually in the fridge overnight.  Keep phyllo covered with a damp cloth so it does not dry. Prepare your work area.  Melt the butter, get a pastry brush, a sharp knife or pizza cutter large working area and a large sheet pan covered in plastic wrap.

6.  Get 2 sheets of phyllo, brush each sheet lightly with butter

7. Cut in half and then in thirds, ending up with 6 strips

8. Place approximately 1 tbsp of mixture at the end of each strip

9. Next you form the triangle, looks tricky, buts it’s not.  Fold over one corner to the opposite side of strip

10. Now fold up

11.  Continue folding on the triangle until you reach the end, may need to tuck in ends.

12. Brush with butter

13. Place on a lined sheet, can be layered with parchment between

14. At this point you can cover and freeze overnight, then place in freezer bags for storage.  Or bake.

15. Pre heat oven 375.  Place on baking sheet.  Bake approx 10 mins on each side or until golden brown

Absolutely delicious!  The phyllo was tender and flaky.  The filling was warm and creamy, the cheese was tangy with hits of spinach. These are nothing like the store-bought or restaurant ones.  Dad said ‘Two thumbs up”.  These are a new favourite. YUM!

Lots and lots of Elmo’s

It has been a while, but finally guest baker Jen is back!  Jen’s little niece was turning 2 and she loves Elmo! We took on the challenge of Elmo Cake Pops and an Elmo Cake.  I must say we were quite adventurous taking on the Elmo cake Pops.  We had only ever made pops that were decorated with sprinkles, that was as fancy as it got.  Elmo, that was a whole other league, but we were up for the challenge!  As soon as I heard Elmo Pops were the goal I headed straight to Bakerella’s fabulous site, couldn’t think of a better place to look then the founder of Cake Pops!  Sure enough she had some Elmo’s. Ours did not turn out quite like Bakerella’s, but for our first attempt I think we did pretty darn good!

Elmo Cake Pops

Please see here on how to make the Cake Pop.

1. Dip Pop into red melting chocolate, making sure to tap excess off so they do not drip

2. White pop is still wet add eyes, we used pre-made eyes.  Could also use white candy with edible marker for pupils

3. Add Jelly Belly (or similar) for nose

4. Cut a brown or black melter in half for the mouth

(Good example of why you need to tap excess off – starting to drip)

5. Texturing (didn’t get a picture of this step)

Once the face has been assembled let the pop sit and dry.  You can leave them at this point (as they are still pretty cute) or add the “furry” texture.  This part is quite time-consuming.

Use a toothpick to dip into the chocolate and drizzle and dab the chocolate over the pop creating a textured look

Not bad for our first attempt at characters Pops! Only 34 more to go!

We also made an Elmo cake.  It was a cheater cake.  Jen found a cute Elmo cake pan, just bake and follow the outline

Lots of Elmo’s I hope she likes them 🙂

My Top 10 of 2011!

Wow! Where did 2011 go?  Seems as I get older the years just fly by.  This year  I did a lot of baking, most were good, some were amazing and a few were total flops!  There were some  new recipes and others were tried and true favourites.  The Daring Bakers took me way out of my comfort zone as I was truly dared with some amazing recipes.  As for the “flops” I posted them too, not everything can turn out well.  I thought I would end the year with a “top 10” list of my favourite recipes of the year.

 10. Perogi Day

Perogi Day was a day I will never forget! Mom, Etta, Jen and myself were at it for almost 12 hours.  We made 9 different flavours, used 25 pounds of potatoes, 7 tubs of sour cream, almost 2 bags of flour and a lot of bacon, cheese and onions.  We ended up with, get ready for it……471 perogies!!!!!!!!!!!!!!! They were delicious, not sure I will be able to go back to the frozen ones from the store.  It was a great day and the results were amazing! We all agreed that we would definitely do it again, just not anytime soon…

9.  Apple Sauce Muffins

These Apple Sauce Muffins were something I stumbled across when visiting Gramma one afternoon.  They were hot and fresh and delicious!  You can’t really taste the apple sauce, they are a little bit sweet and have an amazing texture.  I think I have made them at least 6 times since then.  A wonderful recipe with simple ingredients, Thanks Gramma! 🙂

8.  Baklava

This one was special for me.  I was asked to be the host of the June Daring Bakers Challenge!  Being host meant that I was able to pick any recipe and have all the members make their variations. I had always said, way back when I joined, that if I ever got the chance to host I was going to pick Baklava.  It was amazing to see the different variety of baklava that were made.  I was a little daring (mean) and had everyone make their own phyllo dough.  Some people enjoyed the process, a lot did not, but all in all it was a wonderful experience.  It was a true honour to be picked to be the June 2011 host.  My baklava was delicious.  I will definitely be making it again but, like many other members, I will probably use pre-made phyllo!

7.  Puppy Chow

Puppy Chow was new for me, I had never even heard of it.  Jen had come over to do some Christmas baking and she brought all the ingredients for Puppy Chow…hmmm.  I was pleasantly surprised!  Unlike the name this is a wonderful treat!!!  Very simple, cereal, chocolate, butter, peanut butter and icing sugar.  It is very addicting!  It was a great gift to give away in little Christmas sacks.  Thanks Jen for a great recipe that I will be using for many years to come.  I may have to come up with a more appealing name….

6. Cupcakes, Cupcakes and more Cupcakes!

This was a scary one! Making 130 cupcakes for Kris and Selena’s Wedding!  I had never done anything like this before.  I mean I had made cupcakes but never 130 in one day!  I was a nervous wreck, as I think the wedding cakes is a huge deal.  Sadly it’s the food aspects that people remember more at a wedding then the actual ceremony.  I thought if they don’t turn out I’d have people thinking “god, their cake was horrible”.  Thank goodness everything went smoothly and the cupcakes were a hit!  So much so that there was not near enough 😦 If there is a next time, I will know people will eat more than one! Thanks Kris and Selena!

5. Bachlorette Cake

When Coralee asked me to make Chrissy’s Bachlorette Party cake I was thrilled!  I had just recently taken the Wilton Fondant course and figured this would be the perfect opportunity to give my new skills a try.  For my first try at creating a formed fondant covered cake, I think it turned out pretty good.  I hope to make more in the future.  Unfortunately I fell ill that night and was unable to make the party, so I didn’t get to try it.  Hope it was good!

4. Wedding CakeS!

No, I did not make a typo in the title I meant for the ‘S’ to be big!  This was by far my biggest baking event ever, let alone in 2011.  I was asked to make the cakes for Jen and Martin’s Wedding.  At first I was terrified and think I even tried to talk her out of it, as I mentioned above, the wedding cake is a huge deal!  When I calmed down I was truly honoured and accepted the challenge.  Jen had a wonderful idea of having a cake on each table.  The cake would then be “the wedding cake”, centre piece and dessert.  It really was a good idea.  It was a ton of work but I enjoyed every minute of it and would do it again in a heart beat!  Thanks Jen!!

3. Povitica

This recipe was from the October Daring Bakers Challenge hosted by Jenni of The Gingered Whisk.  She introduced me to something I had never heard of.  Povitica?? I could barely say it let alone make it.  As it was a bread recipe I was very hesitant in even trying it, bread and I do not get along well.  I was pleasantly surprised, it was an amazing dough and so versatile.  I was able to make both savory and sweet loaves out of the recipe.  They were delicious!! This one rang in on my top 3!  I will be making this a lot more in years to come.  Thank you Jenni!!

2. Whoopie Pies!

I was a little late jumping on the Whoopie Pie ban wagon.  Not sure what rock I had been living under but I just heard about these in July.  Apparently they were quite the craze a while ago.  There is even a “Whoopie Pie War” with two States as they both say they are the founder of the Whoopie Pie.  Well, I don’t care who came up with the idea, I’m just glad they did!!  These are little pieces of heaven!  Surprisingly they are not sweet, they have a lovely light texture and a wonderful marshmallow filling.  I have only made the “Classic Whoopie” but I have a book and plan on making many different kinds.  What a wonderful find!

Drum roooooooooooooooooooollllllllllllllllllll…………………….

1. Salted Caramel Shortbread Bars

Without question this was my favourite recipe of the year!  I mean look at at…it’s not only the best tasting dessert bar ever, it’s also a thing of beauty!  This recipe was not even intended for me, haha.  When Jen came over to do some Christmas baking, it was for her to take to her baking exchange.  I had one bite and almost had to sit down.  It is one of those treats that after your first bite you have to stop before you start chewing and your eyes grow twice their normal size as you cant believe this piece of magic in your mouth.  It then turns into an eyes closed slow chew as you take in all the textures and tastes, and then it hits you…the salt!  Your taste buds jump into high gear.  It is like no other dessert experience I have ever had.  Don’t believe me, Try them!!!  Thank you Jen for my FAVOURITE treat of the year!  This recipe will remain at the front of my recipe book to be made time and time again!

I would like to thank my many followers for stopping by throughout the year to see whats up in my kitchen. When I first started this whole blogging thing, I really didn’t think anyone other then family would read.  I was shocked and so happy to see when I had over 20,000 hits!

Thanks again and Happy New Year!  Please come back to see what’s baking in 2012

Salted Caramel Chocoate Shortbread Bars

First off, I must start by introducing a guest baker!  This evening I had the pleasure of baking with Jen, I think she likes baking and baking blogs almost as much as me!  The next three posts were recipes she chose (and wow were they wonderful!).  One was for a baking exchange she was going to (that group is extremely lucky to be getting the Salted Caramel Chocolate Shortbread Bar), the other two recipes, chocolate Peanut Butter Chunk Cookies and Puppy chow, well… they were just to make and enjoy!

The first recipe of the day was the Salted Caramel Shortbread Bar, (another wonderful item from Annie’s Eats) the name is pretty self explanatory but does not do any justice to the dessert.  After tasting it, I think it deserves a much more exciting name!   I love the taste of salt and sweet together, they complement each other so well.  I have had chocolate covered pretzels, trail mixes with nuts and chocolate but I had never made a dessert where salt was the star ingredient.  To be honest I was a little leary of trying them, not really sure why as I love the flavour combination.  When I heard of what Jen picked for her exchange I was quite intrigued and when she sent the recipe entitled “deliciousness” I nearly drowned in drool.  It looked amazing!

Salted Caramel Chocolate Shortbread Bars

For the shortbread layer:

2 cups all-purpose flour
2 tsp. baking powder
¼ tsp. salt
1 cup (2 sticks) unsalted butter, at room temperature
½ cup sugar

Directions:

1. Preheat the oven to 325° F.

2. Line a 9 x 13-inch baking pan with parchment paper.  We would recommend bringing the parchment paper right up the sides of your dish, as it was a bit of a challenge getting the first section out)

3. In a small bowl combine the flour, baking powder and salt. Stir with a fork to blend, and set aside.

4. In the bowl of an electric mixer, beat the butter and sugar on medium speed until well blended, about 1-2 minutes.

5.  With the mixer on low-speed blend in the dry ingredients just until incorporated.

6. Transfer the dough to the prepared baking pan and press in an even layer over the bottom of the pan.

Bake 15-18 minutes or until golden.  (If the crust puffs up a bit while baking, just gently press it down while it is cooling.)  Transfer the pan to a wire rack and let cool completely.

For the caramel layer:

This layer seems to be quite time-consuming and labor intensive (Even with taking turns stirring, I got 2, yes 2 blisters from stirring it for so long!) So, start this as soon as the shortbread is out of the oven.
1 cup (2 sticks) unsalted butter, cut into pieces
1 cup sugar
4 tbsp. light corn syrup
2 cans sweetened condensed milk

Directions:

1. Combine the butter, sugar, corn syrup and condensed milk in a medium saucepan over medium heat.

2. Heat, stirring occasionally, until the butter is melted.  Increase the heat to medium-high and bring to a boil.  Reduce the heat to maintain a simmer, stirring constantly.  Continue simmering and stirring until the mixture turns an amber color and thickens slightly.

3. Pour the mixture over the shortbread layer, smooth the top, and allow to cool completely and set.  (I chilled at this stage to ensure that the caramel layer would not melt when the warm chocolate was added.)

For the chocolate layer:
8 oz. semi-sweet or bittersweet chocolate, finely chopped
1 tsp. light corn syrup
½ cup (1 stick) unsalted butter, cut into pieces
Fleur de sel or sea salt, for sprinkling


Directions:

1. Combine the chocolate, corn syrup, and butter in a heat-proof bowl set over a pan of simmering water.  Heat, stirring occasionally, until the chocolate is completely melted and the mixture is smooth. (Somehow I missed getting photos of this step)

2. Pour evenly over the caramel layer and use an offset spatula to smooth the top.

3. Allow to cool for a minute or two and then sprinkle with fleur de sel.

4. Chill, covered, until ready to slice and serve.

Just look at that! It is a thing of beauty! But not only does it look amazing it tastes even better!  The combination of the sweet and the salt on top is delicious.  The shortbread had a lovely texture, strong enough to hold the square but was mild enough not to over power the treat.  The caramel layer was so smooth and creamy yet firm enough to hold up. The chocolate layer with salt was the finishing touch.  There was just the right amount of sweet and salt.  Upon taking a bite my mouth just came alive!  The salt and sweet made my taste buds jump, even after eating it you could still taste the salt finish.  WOW!!

We figured that one tray would not be enough for 5 dozen so we ended up making two trays of this, which meant I got to keep some 🙂 This is a definite keeper, I can see making this many more times. I hope the baking exchange group enjoys!

I had such a great time baking, especially with someone who shares my passion.  Hopefully there will be more additions to the”Guest Baker”.  Thanks Jen!

Chocolate Peanut Butter Cup Cookies

These delights were the third recipe of the day.  We started off with just making one thing and it snowballed from there, it was GREAT!   This recipe is from a wonderful food blog Jen introduced me to, Annie’s Eats.  She has a huge selection of fabulous looked deserts most of which I would love to try, and just may very well do!

When Jen suggested these I promptly went to the computer to check them out.  I was sold by the photo alone!!  I mean really, a chocolate cookie with huge chunks of peanut butter cups, how could you go wrong?

Chocolate Peanut Butter Cup Cookies

1½ cups plus 2 tbsp. all-purpose flour
6 tbsp. Dutch-process cocoa
½ tsp. baking soda
½ tsp. coarse salt
¾ stick (6 tbsp.) unsalted butter, at room temperature
¼ cup plus 2 tbsp. creamy peanut butter
½ cup sugar
½ cup brown sugar
1 large egg
1 tsp. vanilla extract
2 tbsp. milk
2 cups coarsely chopped peanut butter cups, divided*
*Note: it was suggested to freeze the peanut butter cups for at least 30 minutes before chopping.  It makes them easier to unwrap, easier to cut, and helps them stay intact while you mix them into the dough.

Directions:
1. Preheat the oven to 350˚ F.

2. Line baking sheets with silicone baking mats or parchment paper.

3. In a medium bowl, combine the flour, cocoa powder, baking soda, and salt.

4. In the bowl of an electric mixer, combine the butter, peanut butter, and sugars.

5. Beat on medium-high speed until light and fluffy, 1-2 minutes.  Add in the egg, vanilla extract, and milk.  Blend until smooth.

6. With the mixer on low-speed, mix in the dry ingredients just until incorporated.

7. Add in 1½ cups of the chopped peanut butter cups and fold in gently with a spatula.

8. Use a large dough scoop (we used a tablespoon and over filled it, it was recommended to use a 3 tablespoon scoop, but that seemed too big) to drop rounds of dough onto the baking sheets, spacing 2-3 inches apart.  Gently press a few pieces of the reserved peanut butter cups into the top of each of the dough balls.

9. Bake 12-14 minutes, rotating the pans halfway through baking.  (The cookies may seem too soft immediately after coming out of the oven but they will set as they cool.  You don’t want to over bake them.)  Let cool on the baking sheets about 10 minutes, then transfer to a wire rack to cool completely.  Store in an airtight container

These were quite good! I loved the hint of peanut butter right in the cookie as well ask the chunks of peanut putter cups.  As good as they were, I was not fussy about the texture, kind of chewy (not in a good way).  I will just have to make them again (that’s a shame I know! lol) to play with the texture.